Note Grid - Quantizing Notes
Alright, let’s quantize the notes directly in the pitch domain so we can play freely on the MIDI keyboard while staying locked to a specific scale.
Step 1: Remove the Invert Module #
- Click the Invert module and press Delete or Backspace on your keyboard.
- Alternatively, right-click the module and select Delete.
- This will automatically restore the direct connection between Note In and Note Out, saving you extra steps.
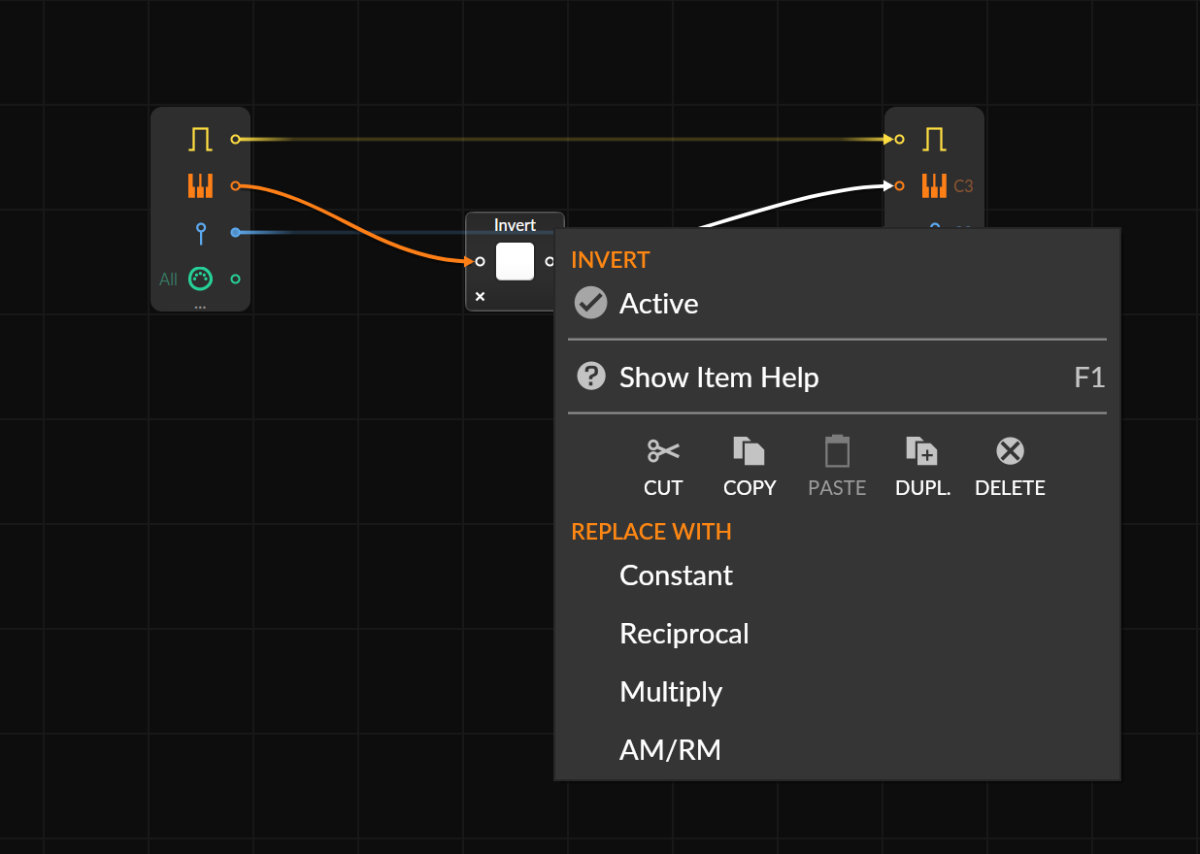
Step 2: Exploring the Right-Click Options #
When right-clicking a module, you’ll see several helpful options:
- Disable (Mute) – Temporarily turns off the module without deleting it.
- Help – Opens the help menu for the module.
- Cut (Ctrl+X) – Removes the module and places it in the clipboard.
- Copy (Ctrl+C) – Copies the module for reuse.
- Paste (Ctrl+V) – Pastes a copied or cut module.
- Duplicate – Creates a second identical module with the same settings.
- Delete – Removes the module entirely.
- Replace With... – Swaps the module while keeping existing cable connections and parameter settings intact (great for quick experimentation!).
Now that the Invert module is gone, we can move on to setting up pitch quantization for a scale!
Step 3: Add a "Pitch Quantize" Module #
Next, we’ll add a Pitch Quantize module, which we can grab from the palette. To do this, type Pitch Quantize into the search field at the top, select the module, then click and drag it into the Grid window.
Here’s a little trick: if you drag it directly onto the Pitch Input of the existing connection, it will automatically link the input and output cables of the Pitch Quantize module to the relevant modules. This combines two steps into one, making things a bit easier. I’ve always done it this way, and I’ve shown it before in previous examples.
Once the module is in place, we can define the specific notes we want to restrict our pitches to. In this case, I’ll select the C Major scale, which includes all the white keys. As you can see, the Pitch Quantize module visually represents a single piano octave, with black keys on top and white keys below.
After that’s set up, we can also take a look at the Inspector panel for the Pitch Quantize module, where you’ll find some additional interesting options.
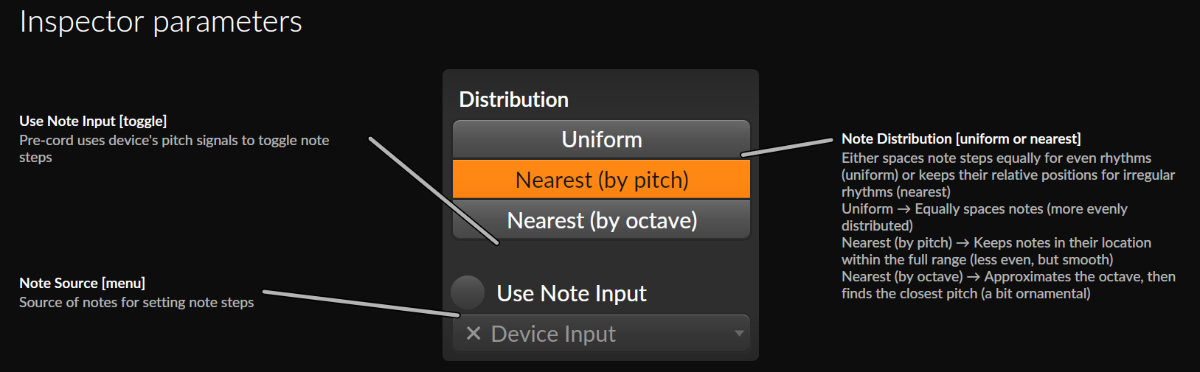
In the Inspector for the Pitch Quantize module, which you can access by clicking on the module and then looking at the Inspector panel on the left, you’ll find a few important options:
- Naming and Deactivation: You can rename the module to keep things organized, or deactivate it if needed.
- Pitch Distribution Selector: This dropdown allows you to choose how notes are quantized:
- UNIFORM: Distributes quantized notes evenly across the scale.
- NEAREST BY PITCH: Adjusts notes to the nearest pitch in the selected scale, preserving their original pitch as closely as possible.
- NEAREST BY OCTAVE: Keeps the notes quantized to the nearest pitch while also considering the original octave, which may result in a more natural sound depending on the context.
Each option has its own use case depending on how you want the quantization to behave, and you can learn more about them by checking the help menu, where these features are briefly explained.
Another interesting feature in the Inspector is the Note Input Dropdown. This allows you to import note information from another track or device. It works similarly to Bitwig’s Note Harmony tool, enabling real-time changes to the pitch quantization.
For example, if you’re playing chords on a different track that change dynamically, the Pitch Quantizer will adapt to those chords in real-time. This means you’re not limited to static note selections - you can have live note input controlling the quantization.
It’s a super powerful feature, and I use it often in my own projects. I’ve even made a video explaining this in more detail if you’re curious to see it in action.
Test the Quantizer #
Now, try experimenting with this setup. You can either play around on your MIDI keyboard or draw notes in the Piano Roll. You’ll notice that all the notes passing through this Note Grid are corrected so that there are no more black keys. Black notes are transposed into white ones.
The Pitch Quantizer essentially quantizes your input so that you only play white notes, or whatever scale you’ve set in the Pitch Quantizer, or what the Live Note Input Dropdown is feeding into it.
What you’ve built here is basically a diatonic transposer or a Key Filter, as it’s now called in Bitwig Studio. This allows you to limit notes to a specific scale - a super handy tool that you can use in many scenarios and that works well.
Polyphony Reminder #
It's also important to mention the polyphony settings for the Note Grid. If you select the Note Grid device or click in an empty area of the Note Grid workspace, you can adjust the polyphony in the Inspector on the left. By default, it’s set to 12 voices, meaning you can play up to 12 instances simultaneously.
If you use this patch with 12-voice polyphony, try playing a chord on your keyboard. Each note you play simultaneously will be processed by the Pitch Quantizer. The more keys you press, the more instances of the patch are created by Bitwig - each note runs through the exact patch you've built.
If you lower the polyphony to 1, meaning it’s set to monophonic, you’ll only be able to play one note at a time. When you try to play a chord, you’ll notice that the Note Grid only plays the lowest or most recently pressed note, while the others are ignored.
This is the key difference between monophonic and polyphonic settings in the Note Grid. If you want to play chords and have all the notes pass through the Pitch Quantizer, it’s important to set the polyphony high enough to handle multiple voices.
The advantage of a monophonic setting is that only one voice is active at a time, which can be useful for basslines (where you only need one note at a time) or generative patches. In monophonic mode, the single voice is always active, meaning you don’t need to press any notes to trigger it. This is particularly useful in scenarios where you want continuous sound generation without relying on note input.
I wanted to emphasize this again because I've mentioned it before, but it's a common source of confusion. Understanding the difference between monophonic and polyphonic settings will help you avoid issues in your projects.
▶ Next Lesson: Creating Chords Chords
◀ Previous Lesson: Creating Patches
▲ Bitwig Grid Course Overview