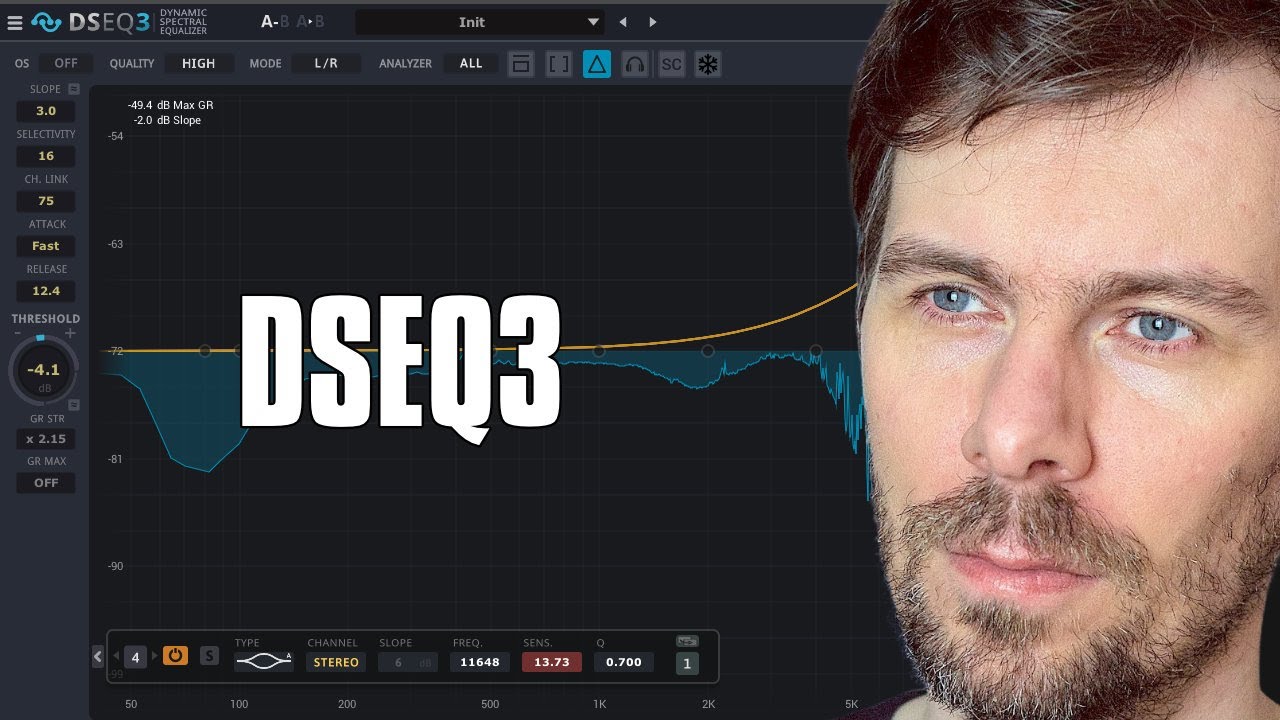
DSEQ3 Remove Resonances and Balance your Mix
Tutorial | Apr 04, 2024
In this video, I discuss the EQ Three by TP Pro audio, emphasizing that it is often overlooked due to the lack of advertisements or sponsored videos. I demonstrate various ways to use the EQ, such as as a track spacer or a spectral gate. Additionally, I explain how it can be utilized as a "magic cue" or an analyzer for comparing frequency distributions between tracks.
You can watch the Video on Youtube
- support me on Patreon
- Download and Buy DSEQ3
In this video, I explore the DSEQ3 by TP Pro Audio, emphasizing its underrated value due to minimal advertising, costing only $79. I highlight its versatility and utility in various scenarios, particularly for mixing and mastering in music production. Here are the key points:
-
Versatility: Demonstrated by using it in different contexts, such as layering synthetic drums with acoustic drum loops, employing sidechain features for dynamic EQ adjustments, and as a spectral gate.
-
Dynamic EQ with Sidechain: By feeding synth drum signals into the EQ3 on an acoustic drum loop track, it dynamically cuts frequencies that clash, allowing for precise control over gain reduction, attack, and release times.
-
Spectral Gate Functionality: Reversing the input setup turns the EQ3 into a spectral gate, allowing selective frequency playback based on the sidechain input, useful for creative sound design.
-
Analytical Tool for Mixing and Mastering: Showcases the EQ3's capability to act as a "magic EQ" by analyzing and comparing the frequency distribution of a track against others, aiding in achieving a desired mix balance.
-
Practical Application Examples: Provides step-by-step examples of using the EQ3 for frequency ducking, enhancing mix clarity, and utilizing it as an analytical tool for mastering by comparing frequency distributions.
-
Advantages and Offerings: Stresses the plugin's affordability, no need for iLok, free updates, and mentions the company's origin (Germany), appealing to potential buyers.
-
Call to Action: Encourages viewers to consider the plugin for its broad utility in music production, mentioning a link for more information and inviting likes and subscriptions.
This tutorial is not just a walkthrough but a comprehensive showcase of the EQ3's functionality, making a strong case for its inclusion in music production workflows for its versatility, dynamic EQ capabilities, and utility as an analytical tool in mixing and mastering processes.
Questions & Answers #
Maybe you dont watch the video, here are some important takeaways:
What is the EQ Three by TP Pro audio? #
The EQ Three by TP Pro audio is a versatile EQ plugin that is often overlooked due to its lack of advertisements or sponsored videos. It is a useful and versatile tool that can be used in various situations and for different use cases.
How can the EQ Three be used for frequency shaping? #
The EQ Three can be used to shape frequencies in multiple ways. It can be used as a track spacer by reducing frequencies of one instrument to make room for another. It can also be used as a spectral gate to cut out specific frequencies from a track. Additionally, it can be used as an analyzer to compare the frequency distribution of a track to another one for mixing or mastering purposes.
What are some key features and settings of the EQ Three? #
The EQ Three offers various features and settings for adjusting the frequency response. These include gain reduction strength, attack and release settings, slope adjustment for prioritizing low or high end, selectivity for grouping frequency bands, and customization of the threshold using a scanned track. It also offers a smart AI feature.
Where can I find more information and purchase the EQ Three? #
More information about the EQ Three by TP Pro audio can be found on their website, where it can also be purchased for $79. The plugin does not require iLok and most updates are free. It is a German company.
Transcription #
This is what im talking about in this video. The text is transcribed by AI, so it might not be perfect. If you find any mistakes, please let me know.
You can also click on the timestamps to jump to the right part of the video, which should be helpful.
[00:00:00] So in this video, I want to talk about this EQ three by TP Pro audio.
[00:00:04] And before I start the video, just a short disclaimer,
[00:00:07] this video is not sponsored.
[00:00:09] I'm not affiliated with the company itself.
[00:00:12] I never talked to the company.
[00:00:14] It's just pure love.
[00:00:16] Okay.
[00:00:17] So this, this EQ here is basically probably the most slept on plug in ever
[00:00:25] because they don't do ads.
[00:00:27] They don't do sponsored videos.
[00:00:29] There is no I look.
[00:00:30] It's only 79 bucks.
[00:00:31] And it just, you know, does its thing.
[00:00:36] It's just a useful plug in.
[00:00:38] It's not fancy.
[00:00:39] It's not, you know, flashy or anything.
[00:00:41] It just, you know, you can do all kinds of different things with this.
[00:00:45] So it's very useful and very versatile.
[00:00:49] That's what I want to say.
[00:00:50] So in this video, I want to show you basically how I use it in different
[00:00:57] situations in different, for different use cases.
[00:01:00] So first up, maybe you know the plug in called track spacer.
[00:01:04] You can do basically the same thing with the CQ three, just in the spectral
[00:01:08] domain and with the, with the much more influence on it.
[00:01:12] Right.
[00:01:12] So here I have this kind of acoustic drum loop or breakbeat in the background.
[00:01:16] I made with addictive drums to it sounds like this.
[00:01:19] And I have some synth drums here, a kick drum and a snare drum into a
[00:01:26] bus. It's a very basic, right?
[00:01:31] So I want to layer basically these synth drums with this acoustic drum loop.
[00:01:35] And you want to get rid of some of the frequencies inside of this acoustic
[00:01:40] drum loop, right?
[00:01:40] Because the kick drum and the snare drum share the same frequencies.
[00:01:43] So you can just put an EQ on that and, you know, create some weird looking
[00:01:48] curve and cue out the kick and the snare and so on.
[00:01:52] And you can also use something like track spacer, which is some kind of compressor
[00:01:57] that uses sidechain plug in and then it ducks the frequencies.
[00:02:00] But you can also use just the CQ three, which kind of does the same.
[00:02:05] So here we use the sidechain inputs.
[00:02:09] We use the output here of the drums master post.
[00:02:11] And to use here the, this small little knob called sidechain.
[00:02:17] So you have to enable here the sidechain feature.
[00:02:21] And then you get basically the sounds of this synth kick and synth snare
[00:02:26] into the DSEQ three on this acoustic drum loop track.
[00:02:30] So that's the setup.
[00:02:31] So now the DSEQ three catches basically the frequencies of the synth kick and
[00:02:47] synth snare and tries to reduce exactly these frequencies on this acoustic drum
[00:02:53] loop. And we can influence this in multiple ways.
[00:02:57] First up, we can change the gain, strength or gain reduction strength,
[00:03:01] which is something like a ratio on a compressor.
[00:03:04] So you can say you have the multiplayer of one, a multiplier of one here
[00:03:08] and then increase this.
[00:03:14] So it pulls down these frequencies that are detected much more, much stronger.
[00:03:19] So you can reduce the volume of these frequencies even more.
[00:03:22] Then we have your attack decay or attack on release.
[00:03:26] So it releases basically these frequencies much faster.
[00:03:34] But most of the times it sounds too,
[00:03:37] yeah, it's a bit distorting the signal anyway.
[00:03:42] That's too slow.
[00:03:47] You just still want to have some percussion in between the kick and the snare in there.
[00:03:53] It also depends, of course, all the settings here depends on what you want to achieve.
[00:04:05] Sometimes you want to completely get rid of the frequencies.
[00:04:08] And sometimes you just want to layer slightly.
[00:04:12] So you want to have a bit of frequencies of the acoustic drums in there
[00:04:16] and also some of the synth kick and synth snare in there.
[00:04:21] Right. So we want to mix it basically slightly.
[00:04:24] So it depends on your on your taste.
[00:04:27] We have also the slope where we can influence basically the prioritization
[00:04:32] of the low end and the high end.
[00:04:36] More low end.
[00:04:38] It just takes away frequencies here from the kick.
[00:04:40] More top end.
[00:04:46] Or something in between, probably just right.
[00:04:49] You can see the fundamental of the snare pretty clearly.
[00:04:54] Let's bypass.
[00:05:04] Let's bypass.
[00:05:06] In my opinion, that's OK.
[00:05:16] We can also change the selectivity,
[00:05:18] which means we can increase the bands or the bands, the frequency bands.
[00:05:23] But if you increase this too much.
[00:05:25] Yeah, then it sounds more like an MP3 encoder at some point.
[00:05:31] So something something between zero and one hundred is probably the best.
[00:05:48] We don't want basically all the individual frequency bands to take care of.
[00:05:56] You want to group them and maybe smooth it out a bit.
[00:06:00] This is how I use it most of the times, at least.
[00:06:02] So that's OK.
[00:06:18] Then instead of using this as a track spacer or as a frequency
[00:06:24] dugout, you can also just reverse this.
[00:06:27] We can say instead of using here drum post, we use drums pre.
[00:06:32] So we can mute this and still get the audio from the drums
[00:06:36] because it's now pre fader.
[00:06:39] And then here we basically use the delta signal.
[00:06:44] Right. So now it becomes some kind of gate.
[00:06:47] So we use the kick drum, the synth kick and the synth snare here
[00:06:51] to basically only play these frequencies.
[00:06:54] But in this acoustic drum loop,
[00:06:57] so we cut out basically the frequencies and just play them.
[00:07:00] So maybe, you know, the plug in called silencer,
[00:07:24] which is some kind of spectral gate.
[00:07:26] You can do kind of the same thing with this
[00:07:29] because you can cut out only the kick, only the snare,
[00:07:34] or maybe only hi-hats based on the side chain signals.
[00:07:38] We can use maybe a white noise, a cue white noise on a second channel.
[00:07:42] And then you can use the stand to cut out
[00:07:45] or get some frequencies out of this drum loop here or some audio material.
[00:07:52] So it's also a spectral gate if you want to use it that way, right?
[00:07:56] So maybe that's something for you.
[00:07:59] But here we just want to use it as an gain reduction tool.
[00:08:03] Then there's this problem.
[00:08:13] Maybe you are finished with your track
[00:08:15] and you want to compare your track to another released track
[00:08:21] to the mix or to the frequency distribution.
[00:08:25] And you can also use this EQ three as a magic cue.
[00:08:28] But it's even better than a magic cue in most cases.
[00:08:32] And I show you why.
[00:08:33] So you have a DSTQ three on the master, right?
[00:08:36] And we can just use the slope of four dot zero DB per octave.
[00:08:42] So three is pink noise.
[00:08:45] Four dot five DB is maybe too warm.
[00:08:47] And I use your four dot zero.
[00:08:50] And we have now the straight line here, right?
[00:08:54] And we can pull this down to threshold.
[00:08:57] And maybe you don't like that it's a straight line.
[00:09:03] So you can influence this line, of course, with these parametric
[00:09:07] EQs or with pre EQ and amplify certain things for the analyzer.
[00:09:13] But we can also just scan a different track and use this as a threshold.
[00:09:19] So here I'm using some kind of track.
[00:09:23] What?
[00:09:24] Something like this, right?
[00:09:29] We pull this in.
[00:09:30] Some kind of drum based tune.
[00:09:34] And we just cut out here the meat of the track where we have, let's say.
[00:09:39] Bass and drums.
[00:09:43] So we have this here in the master.
[00:09:48] And then I mute this here for a moment so I don't get striked.
[00:09:53] Um, we hit basically a record inside of the SQ and we can record
[00:09:59] then the audio signal.
[00:10:00] So I hit record and then hit, let's say play.
[00:10:03] And I scan or analyze this for a moment.
[00:10:07] To get all the different frequencies or the frequency distribution of this track.
[00:10:13] I think that's enough.
[00:10:16] And then we have your threshold from inputs.
[00:10:20] We can use this already, but you can also save this as a threshold file.
[00:10:25] So export.
[00:10:26] Let's maybe call this.
[00:10:28] By bar activity.
[00:10:32] Right.
[00:10:35] And then we can use this every time we master or we mix something down
[00:10:40] and can compare it to this kind of track here or the frequency distribution of this track.
[00:10:45] So let's mute this here and go back to the master.
[00:10:50] So to use this now, we would the slope to zero to be that's kind of important.
[00:10:57] So it's not influenced by the slope here.
[00:11:00] Right. So we only use basically the bear signal, the bear frequency distribution
[00:11:05] of the scant track.
[00:11:06] Then we use here plus 30 dB as a threshold.
[00:11:12] That's how the manual says you need you need to do it.
[00:11:17] And then we enable here basically the custom threshold.
[00:11:20] So now we can play this and you can already see how it tries to take away certain frequencies here.
[00:11:28] You can pull down the threshold.
[00:11:30] Right. And it tries to take away a lot of high end.
[00:11:36] That's probably because it's an MP3 and it's also ready master tunes.
[00:11:42] So they put probably a high shelf on that.
[00:11:46] So you can see completely here the curve of this original tune we just scanned.
[00:11:50] And you can see where you are diverging from this frequency distribution.
[00:11:56] Right.
[00:11:57] And also increase the selectivity to have more bands.
[00:12:03] And we can also increase the attack.
[00:12:07] So some of our transients are leaking through right now, not suppressed.
[00:12:11] Only the tails of the sound are pushed down now.
[00:12:22] Maybe go back to one here.
[00:12:29] And you can use this now as an EQ as a magic you because we just pull down all these frequencies.
[00:12:38] But you can also use this just as an analyzer so you can compare it basically to your own track.
[00:12:43] And you can see here where it tries to remove certain frequencies and you can go down to your tracks
[00:12:49] and maybe remove some of the overtones from the bass or maybe from the kick or whatever.
[00:12:54] So you can also use this as an analyzer and compare your own mix down to other mix downs
[00:13:02] and can perfectly see what's going on.
[00:13:06] So if you are interested in this plug in, there's a link in the description below to this website here.
[00:13:11] There's also a lot of stuff in this plug in.
[00:13:14] I haven't talked about in this video and also some stuff I talked about in different videos on my channel.
[00:13:20] Maybe you want to look them up.
[00:13:22] There's also smart AI in there if you like this buzzword.
[00:13:26] So click the link.
[00:13:28] It's only 79 bucks.
[00:13:30] There's no I lock.
[00:13:32] Most of the updates are free.
[00:13:35] And it's a German company.
[00:13:37] What else do you want?
[00:13:38] Right.
[00:13:38] So link is in the description below.
[00:13:40] Thanks for watching.
[00:13:41] Leave a like if you like the video.
[00:13:43] Subscribe to the channel.
[00:13:45] Thanks for watching and see you in the next video.
[00:13:46] Bye.
[00:13:47] [silence]