Bitwig All-Pass Delay Device - Create Reverbs and Diffuse Signals
Bitwig Guide | Aug 22, 2022
The video explains how the all-pass device in Bitwig Studio works by passing all frequencies while introducing delay, phase diffusion, and metallic ringing sounds, which are essential for building reverbs and creative sound effects. It demonstrates how the device can be replicated in Bitwig's Grid and discusses its use in artificial reverbs, where many all-pass modules are combined in parallel or sequential arrangements. The creator recommends exploring Valhalla DSP's blog for deeper insights into reverb design using all-pass filters.
You can watch the Video on Youtube
- support me on Patreon
Short Overview #
In this video, I dive into the All-Pass device and explore how it works and what you can do with it. I show how it passes all frequencies through, but when you adjust the delay and gain, you can create everything from simple delays to metallic, filtered sounds, and even reverb effects. I also explain how allpass devices are essential in building reverbs, especially in plugins, and share a simple patch in Bitwig Studio's Grid to illustrate the concept. If you're interested in the technical side of reverb design, I recommend checking out the Valhalla DSP blog for more in-depth information.
- Introduction and apology for the video upload break to refresh ideas and inspiration
- Main topic: Explanation of the All-Pass Delay (All-Pass) device/module
- Demonstration of the All-Pass device using an oscilloscope to show input and output behavior
- Description of All-Pass as a device that passes all frequencies through, with adjustable delay and gain settings
- Clarification of confusion about its placement in the delay section, not the filter section
- Explanation of basic operations:
- With all settings at zero, the output matches the input with no change
- Introducing delay creates a simple delayed output
- Gain adjustment in the feedback path introduces metallic or ringing sounds at short delay times
- Discussion of its use for diffusion, phase shifting, and sound manipulation, especially in reverbs
- Demonstration of how an all-pass filter can be recreated inside Bitwig’s Grid using blend, delay, and feedback modules
- Overview of similarities between all-pass and comb filter devices
- Mention that all-pass devices form the foundation of many artificial reverb algorithms
- Reference to Valhalla DSP blog for deeper exploration of reverb and all-pass networks
- Mention of random modulation of delay times to avoid metallic artifacts in reverb sound design
- Encouragement to experiment further with all-pass devices to create unique sound textures and reverbs
Introduction and Apology #
In this video, I discuss the All-Pass device, commonly referred to as the allpass filter or allpass module, within Bitwig Studio. Before diving into the topic, I want to apologize for my absence over the past week or two. I needed a break to reset my mindset and gather fresh inspiration for new videos. Now that I’m back, I’m excited to kick things off by exploring the All-Pass module, which I demonstrate using input and output signals visible on an oscilloscope.
What Is the All-Pass Device? #
The All-Pass device, as its name suggests, allows all frequencies from the input to pass through to the output. At first glance, this might seem unremarkable. The module features delay settings and a gain knob measured in percentage, which can be confusing for users, especially since it sits under the delay section rather than the filter section in Bitwig Studio.
How Does the All-Pass Device Work? #
When all settings are set to zero, the All-Pass device doesn’t alter the signal at all, the output exactly matches the input, with no delay or change in tonality. Introducing delay settings causes the output signal to be delayed by the specified amount. Increasing the gain to 100 percent disables or greys out the delay function, again resulting in no change to the signal.
When the gain is set to a value between 0 and 100 percent and the delay is adjusted, the device starts behaving like a delay with feedback, producing a delayed signal that can create a unique audio effect. At very short delay times, you can hear a metallic sound, and it starts to sound as though frequencies are being filtered.
Practical Uses in Sound Design #
The All-Pass device can be used for much more than just introducing delay:
- Phase Manipulation: It can cause phase shifts, altering the relationship between frequencies in the signal.
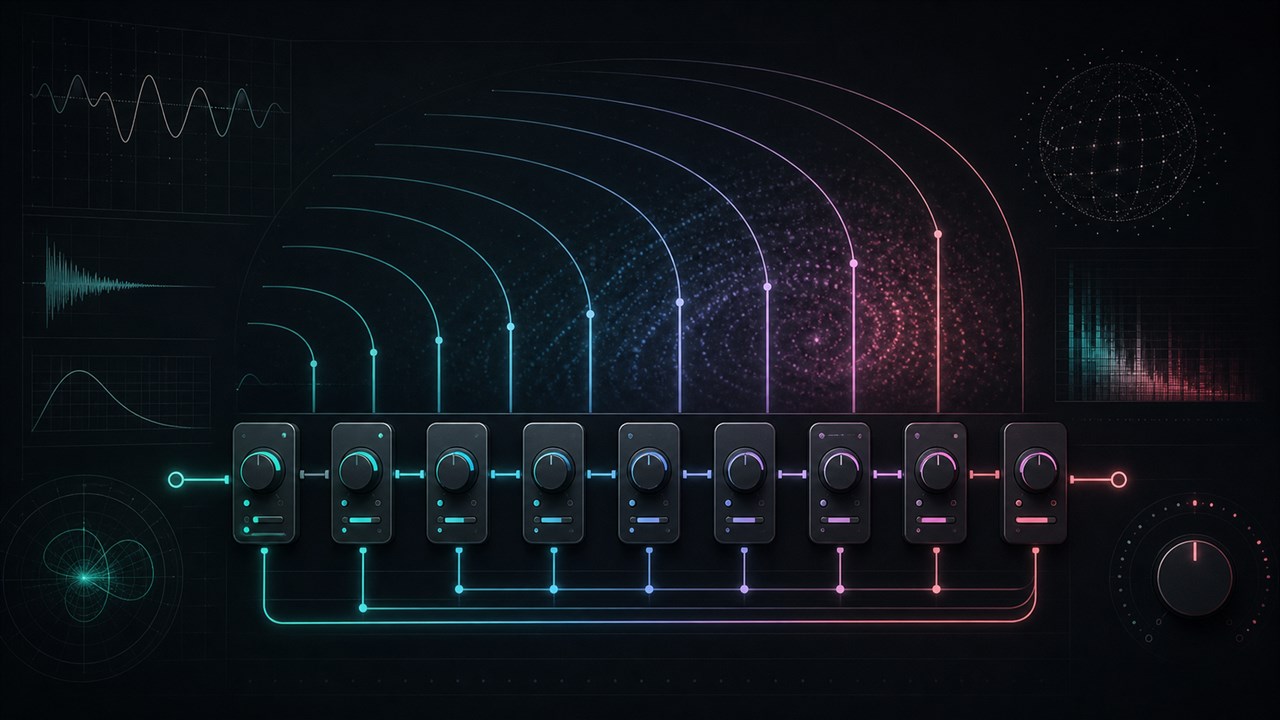
- Diffusion and Reverb: By stacking and modulating allpass devices, you can create diffusion effects, spreading sound energy over time and frequency, a key technique in artificial reverb algorithms to produce a sense of space.
- Ringing and Metallic Sounds: With certain delay and feedback settings, the device can introduce ringing or metallic effects, making it useful for unique sound design.
- Frequency Cancellation: The typical behavior of layering delayed signals can lead to frequency cancellation, creating comb-filter-like effects.
Inside the All-Pass Device: Signal Flow #
I recreated the internal structure of the All-Pass device using grid modules in Bitwig Studio. The signal path consists of:
- The input signal enters a blend module, which mixes the input with the delayed output.
- The mixed signal passes through a delay module.
- Another blend module mixes the delayed signal with the original input.
- Modulation is used to control the blend ratios for creative flexibility.
With zero settings, there’s no effect. Introducing delay and feedback settings starts producing the classic delay and metallic/ringing sounds.
Relation to Comb Filters #
The comb filter, also located in Bitwig’s delay section, shares similarities with the allpass device. Both employ feedback loops and delays, leading to phase cancellations and the creation of harmonic resonances. However, while comb filters explicitly create periodic notches in the frequency spectrum, allpass filters mainly alter phase, providing diffusion and subtle tonal changes rather than direct frequency drops.
Use in Reverb Algorithms #
Allpass devices are heavily used in artificial reverb algorithms. According to resources like the Valhalla DSP blog, reverbs designed to create a sense of space (as opposed to modeling real acoustic environments) rely extensively on arrangements of allpass modules, sometimes in series, sometimes in parallel. Modulating the delay times of these modules helps avoid undesirable ringing or metallic artifacts, resulting in a more natural reverb tail.
Example: Building a Reverb in Bitwig’s Grid #
I showcase a reverb built in Bitwig's Grid using several allpass devices. By randomly modulating their delay times, you can minimize metallic ringing and produce a smoother, more spacious reverb effect. This technique is integral to modern artificial reverb design.
Recommendations and Further Reading #
For those who want to dive deeper, I highly recommend reading the Valhalla DSP blog, which covers reverb algorithms and allpass filter techniques in detail. There are numerous patch diagrams and explanations available there.
Conclusion #
In summary, the All-Pass device in Bitwig Studio is a versatile tool capable of more than it initially appears. From introducing phase shifts and creating unique filter effects to forming the backbone of artificial reverbs, it’s an essential part of the sound designer’s toolkit. I hope this overview clarifies its function and inspires new creative approaches in your projects. Thank you for watching, and I’ll see you in the next video.
Full Video Transcription #
This is what im talking about in this video. The text is transcribed by Whisper, so it might not be perfect. If you find any mistakes, please let me know.
You can also click on the timestamps to jump to the right part of the video, which should be helpful.
Click to expand Transcription
[00:00:00] (upbeat music)
[00:00:02] Welcome back to another video.
[00:00:07] Today I want to talk about all past devices.
[00:00:10] And at first I want to say a big sorry to everyone
[00:00:13] because I didn't make a video in one or two weeks.
[00:00:17] I don't know exactly, but I needed to reset my mindset
[00:00:22] or get some refreshed ideas, refreshed inspiration.
[00:00:29] But now I am back doing some videos again.
[00:00:32] And the first video I want to start today
[00:00:36] with is the All-Pass module, as you can see here,
[00:00:39] this one in the middle.
[00:00:41] And I hooked up some oscilloscope at the input
[00:00:46] and the output of the All-Pass device
[00:00:48] to show you what's going on.
[00:00:50] And the All-Pass device is exactly doing that
[00:00:55] but the name says it passes through all frequencies
[00:00:59] from the input to the output.
[00:01:02] And that's nothing special.
[00:01:04] So you have some delay settings here
[00:01:07] and a gain knob with an percentage unit, which is strange.
[00:01:12] And many people are confused with this module
[00:01:16] because it's below the delay section here,
[00:01:20] but it sounds like on filter, right?
[00:01:22] You know the low-pass and the high-pass,
[00:01:25] where you can cut the low end.
[00:01:28] But this one here is below delay and not below filter.
[00:01:33] So what's going on with this module?
[00:01:37] And if you have everything at zero here
[00:01:42] and we input some sound, nothing is happening.
[00:01:46] We just have the input signal and the output signal matched.
[00:01:50] So it's the same signal.
[00:01:52] No delay, no change in tone or something else.
[00:01:55] When you introduce some delay settings here
[00:02:00] or longer delay times, you just have a delay.
[00:02:05] So the output signal is delayed to a certain amount of time.
[00:02:09] We have here 500 milliseconds.
[00:02:11] And you can see exactly that.
[00:02:15] Okay, so also nothing special.
[00:02:21] And now you can introduce here some gain with a percentage.
[00:02:25] And when we go to 100% and input signal,
[00:02:28] but the same delay, you can see it's disabled
[00:02:32] or grayed out here when you go to 100%.
[00:02:34] We also have no delay and no change in tonality here.
[00:02:44] But when you go with the gain setting
[00:02:47] in between in the middle here,
[00:02:50] it sounds like a delay with a feedback.
[00:02:52] So now we have a feedback
[00:02:59] or just a regular mod delay set up basically.
[00:03:04] But when you go here to very short amount of delay times.
[00:03:12] (gentle music)
[00:03:14] You can hear some kind of metallic sound.
[00:03:25] Sometimes it sounds like some frequencies are filtered out.
[00:03:30] (gentle music)
[00:03:32] So you can use this alpast device to delay signals.
[00:03:49] You can use it to filter out a certain amount of frequencies.
[00:03:54] In fact, you can introduce some phase issues,
[00:03:58] some diffusion.
[00:03:59] You can introduce some ringing sounds
[00:04:04] with the right amount of values.
[00:04:06] So it's a pretty handy device,
[00:04:16] which where you can create all kinds of sounds with it.
[00:04:21] And it's heavily used inside of reverb plug-ins.
[00:04:27] Or when you want to create reverb grids,
[00:04:30] then you need a lot of alpast devices
[00:04:33] in all kinds of different setups
[00:04:36] to create kind of air and space and virtual space
[00:04:42] to have a reverb sound.
[00:04:46] And I read or try to recreate this alpast device
[00:04:50] with some grid modules here.
[00:04:56] So this is how I imagine the alpast module
[00:05:00] looks like on the inside.
[00:05:03] So you have the input signal going into a blend.
[00:05:06] And this blend is mixing the output signal of the delay
[00:05:10] with the input signal.
[00:05:11] And then you have at the end here also a blend
[00:05:14] which mixes again the output of the long delay
[00:05:18] and the try input signal.
[00:05:21] And I hooked up here and, yeah, a modulator.
[00:05:25] So we can change with one knob these two blend knobs here.
[00:05:30] Okay, pretty easy.
[00:05:33] And we have this delay setting here.
[00:05:35] So now I have everything at zero and nothing happens.
[00:05:41] So we have the same input and output signal.
[00:05:43] But I can introduce some delay here.
[00:05:47] One second.
[00:05:48] You can see exactly that we have just our signal delayed
[00:05:55] to a certain amount of time.
[00:05:56] One second.
[00:05:57] And we can now introduce the feedback.
[00:06:01] So we have some kind of delay.
[00:06:19] And, yeah, you can go higher here with the value
[00:06:23] and choose shorter delay times
[00:06:25] to introduce this typical ringing sound.
[00:06:50] So this is how I imagined the alpast device
[00:06:55] looks on the inside.
[00:06:57] And I think you can also hook up here
[00:07:00] one spectrum analyzer to the output.
[00:07:04] You can see how the frequency are changing.
[00:07:16] (upbeat music)
[00:07:18] As you can see, you can create some auto harmonics.
[00:07:31] And there is a math algorithm that you can apply
[00:07:36] on how many milliseconds you need
[00:07:39] to hit exactly the right frequencies to be filtered out
[00:07:43] or to have this kind of ringing frequency going on.
[00:07:47] But you don't need to actually apply this math
[00:07:52] because you can use a different device for this.
[00:07:57] And this is called the comp filter,
[00:08:01] which is also in delay.
[00:08:12] And you have the same ringing sound.
[00:08:14] Little bit different, but the overall method is the same.
[00:08:30] You have an feedback loop or a delay.
[00:08:35] And if you, yeah, layer,
[00:08:39] the same signal on top of each other
[00:08:41] with some kind of different delay times,
[00:08:44] you get phase issues, you cancel certain frequencies out
[00:08:49] and you have some kind of filter
[00:08:53] and yeah, a ring modulator or something like this.
[00:08:57] So it's basically a mixture of everything.
[00:09:02] So the alpast device is in delay, it's in filter
[00:09:06] and you can use it to diffuse sounds, to create reverbs.
[00:09:11] And in fact, if you go to the Vahalla DSB block,
[00:09:16] they can read a lot of reverb algorithms.
[00:09:21] And they are basically, as I understand it,
[00:09:24] two types of reverbs.
[00:09:26] The artificial reverbs that just try to create some space
[00:09:30] and some, yeah, some cool sounding reverb sounds.
[00:09:34] And then are the, yeah, simulations.
[00:09:38] And they try to simulate real room
[00:09:41] with all the real physical effects of a reverb.
[00:09:45] And the first part or the first type of reverbs
[00:09:50] that just try to create some virtual space
[00:09:56] are all based on alpast devices
[00:09:58] in all kinds of different setups.
[00:10:01] And you can read a lot of these blog posts here
[00:10:04] if you're interested in this.
[00:10:06] You can see here also some patches
[00:10:10] or some graphs where you can look at how
[00:10:13] some of the reverbs are set up.
[00:10:15] But in fact, the general direction
[00:10:21] is that you have a lot of these alpast devices
[00:10:24] in all kinds of setups, sometimes here in parallel,
[00:10:28] sometimes in sequential order like this.
[00:10:33] And he also talks about this ringing sound
[00:10:37] where you have always this metallic sound
[00:10:40] in your reverbs and how you can circumvent this.
[00:10:43] And in fact, when I created some of the reverbs
[00:10:48] here for the grid, I think it's the kitsch rub.
[00:10:52] We have some alpast devices here.
[00:10:57] And all these delay times are modulated randomly
[00:11:01] with a random modulator or with an LFO,
[00:11:04] I don't know exactly,
[00:11:05] to certain amount of small values.
[00:11:11] So just to change it enough
[00:11:14] that the ringing or metallic sound goes away.
[00:11:17] And
[00:11:18] as you can hear, it works.
[00:11:25] (orchestral music)
[00:11:29] (orchestral music)
[00:11:32] (orchestral music)
[00:11:35] (orchestral music)
[00:11:38] So this is basically just one example
[00:12:05] how you can build and reverb inside the grid
[00:12:10] from Bitwig Studio.
[00:12:12] And I also explained how the alpast device is working
[00:12:17] or what you can do with it.
[00:12:19] If you want to take or dive in more
[00:12:23] or need more information about this heavily,
[00:12:33] I highly recommend this block here from Vahalla DSP.
[00:12:36] There are a lot of informations on there.
[00:12:38] And yeah, I want to close down this video here.
[00:12:41] Thanks for watching and I'll see you in the next one.
[00:12:44] Bye.
[00:12:45] (orchestral music)
[00:12:51] (orchestral music)
[00:12:54] (orchestral music)
[00:12:57] (orchestral music)
[00:13:00] (orchestral music)
[00:13:03] [BLANK_AUDIO]