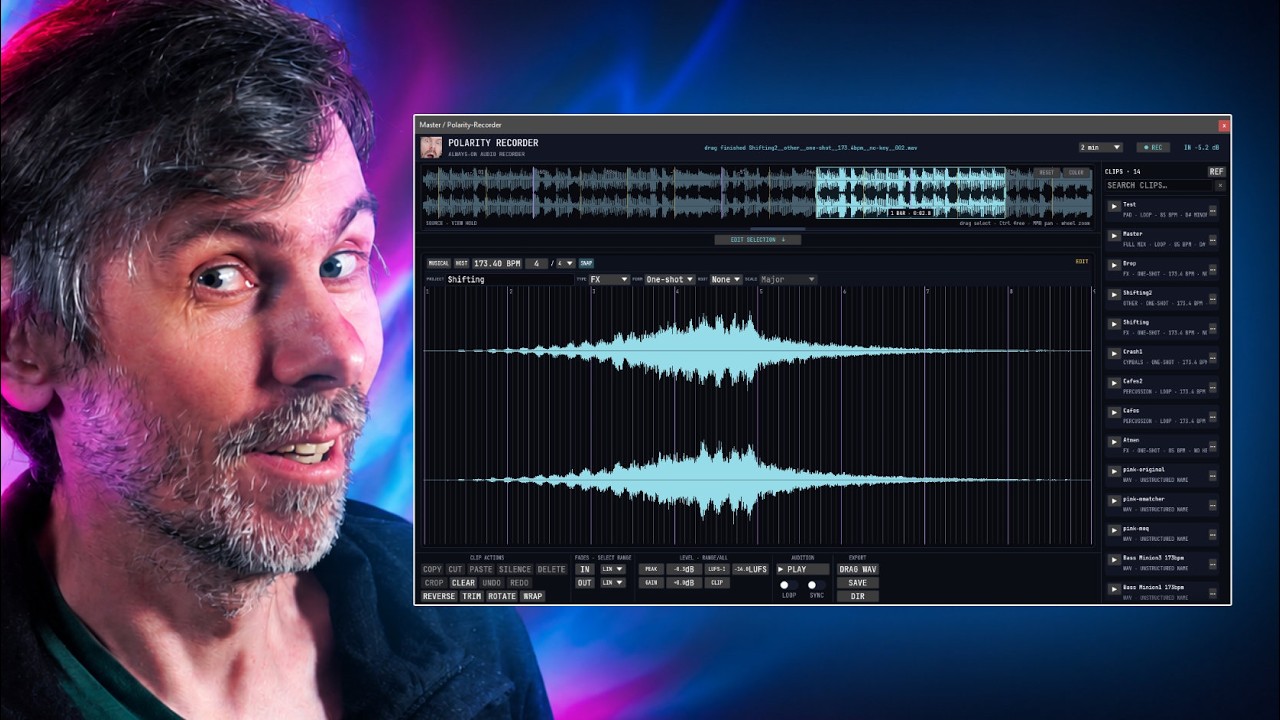
Polarity-Recorder Update: MIDI Export and Auto Sampler
Tutorial | Okt 09, 2026
Download the free Polarity-Recorder update to capture audio plus MIDI in a DAW, export both, and auto-sample instruments with note and velocity naming.
- You can watch the Video on Youtube
- Download the free update and install guides from the Polarity-Recorder download page.
- Support me on Patreon if you like what you hear.
- Download Presets, Tools and Projects on my Dispenser
Quick Answer #
- Polarity-Recorder is a free ring recorder plugin for use inside a DAW and partially outside a DAW, and the latest update is live at polarity.productions/polarity-recorder.
- The update adds MIDI history and export, so incoming MIDI recorded alongside audio can be dragged out or saved as a separate MIDI file together with the WAV.
- A new Auto Sampler mode lets the plugin record notes automatically with note number and velocity, detect the sample end based on a gate/dB threshold, and name repeats with round-robin numbering for multisample creation.
- You can now choose ring buffer bit depth from 8-bit, 12-bit, 16-bit, 24-bit PCM, or 32-bit float, plus set a custom sample/save directory for exported files.
- Extra workflow options include toggleable zoom while selecting/trimming, metadata retention for new clips, and UI scaling; the plugin version is the main supported target, while standalone use still has untested limitations, especially around MIDI features.
Short Overview #
Polarity-Recorder is a free ring recorder plugin for DAW-based sound capture, and the latest update adds MIDI history, MIDI export, and an auto sampler mode. These features make it more practical for preserving both audio and performance data from instrument recordings, so sampled material can be edited, replayed, or turned into multisample instruments without losing note and velocity information.
The update also adds selectable history bit depth options from 8-bit PCM to 32-bit float, plus a configurable sample save directory and workflow-focused metadata settings. In practice, this improves sampling flexibility, supports old-school low-bit recording aesthetics, and speeds up the creation of organized sample libraries for Bitwig, Kontakt, and similar tools.
Key Takeaways #
- The updated Polarity-Recorder is still free and available at polarity dot productions slash polarity recorder, with the new version already live.
- The plug-in now stores MIDI/note history alongside recorded audio, so when recording an instrument in a DAW, both the audio and corresponding MIDI can be dragged out or exported separately.
- Exporting or saving a recording writes both a WAV file and a MIDI file into the target/temp folder, even if the MIDI notes are not yet visually displayed in the recorder UI.
- A new Auto Sampler mode can capture a played note, detect its MIDI note number and velocity automatically, and save samples with filenames that include note, velocity, and round-robin numbering for repeated captures of the same note/velocity.
- The auto-sampling workflow works best by feeding the instrument a prepared MIDI clip with selected notes and velocities, making it practical to build multisample patches for Bitwig, Kontakt, or similar samplers.
- Auto Sampler uses a gate threshold: after key release, it waits for the sound or reverb tail to fall below a specified dB level before trimming and finalizing the sample.
- The recorder now allows choosing ring buffer/history bit depth from 8-bit, 12-bit, 16-bit, 24-bit PCM, or 32-bit float, including lo-fi 8-bit capture for old-sampler-style results.
- Current limitation: standalone use is not fully tested, especially the MIDI functionality; development focus is currently on the plug-in version inside the DAW.
Polarity-Recorder Update: MIDI History, Auto Sampler, Bit Depth Options, and Custom Save Location #
Polarity-Recorder, a free ring recorder for use inside a DAW and outside a DAW, has received a feature update. The new version is available at:
polarity.productions/polarity-recorder
The update adds MIDI history and export, an auto sampler mode, selectable history bit depth, a configurable sample folder, and several workflow improvements.
What It Does #
Polarity-Recorder captures audio into a ring buffer. A ring buffer is a continuously updating temporary recording that keeps the most recent audio in memory, making it possible to recover and export material after it has been played.
The updated version can now also retain incoming MIDI data alongside the recorded audio. This is useful when recording instruments inside a DAW, especially virtual instruments such as synthesizers or pianos, because note data can be exported together with the sound.
New Features #
MIDI history and export #
When MIDI enters the plug-in, the note data is stored alongside the audio in the ring buffer. After recording, both can be exported:
- the audio as a
.wavfile - the MIDI or note data as a separate MIDI file
This makes it possible to preserve both the performance and the resulting sound. For example, a piano performance played through a virtual instrument can be exported as audio while also retaining the exact note and velocity information used to generate it.
The MIDI data is also written to disk when saving, alongside the wave file in the storage folder.
Auto sampler mode #
A new Auto Sampler mode turns the recorder into a sample-capture tool for building multisampled instruments.
In this mode:
- a note is played into the instrument
- the plug-in records the resulting sound
- it waits until the sound decays below a defined gate threshold
- the sample is trimmed automatically
- the file is named using the detected MIDI note and velocity
If the same note and velocity are sampled multiple times, the recorder appends a round-robin number such as 001, allowing multiple variations of the same sample to be saved without naming conflicts.
This is useful for building multisample patches for samplers such as Bitwig’s Sampler or other third-party tools.
Selectable history bit depth #
The history buffer format can now be chosen from:
- 8-bit PCM
- 12-bit PCM
- 16-bit PCM
- 24-bit PCM
- 32-bit float
This controls how the ring recorder stores captured audio. The inclusion of 8-bit support makes it possible to start with a deliberately low-resolution sound reminiscent of older hardware samplers.
Custom sample directory #
The save location for exported samples can now be configured manually. This determines where wave files and related data are stored when using save or export functions.
Users updating from an earlier version may want to verify the folder path, especially if they already rely on a previous default clip or sample directory.
Interface and workflow settings #
A few practical options were added to improve daily use:
- Zoom while selecting or trimming can be enabled or disabled. Some users prefer automatic zoom during selection, while others prefer a stable overview.
- Keep metadata for new clips can now be toggled. When enabled, metadata fields are preserved across new selections instead of resetting each time. This is helpful when saving multiple related samples such as percussion hits.
UI scaling #
The plug-in now includes a scaling feature consistent with the developer’s other plug-ins.
How MIDI Capture Works #
A typical DAW setup places an instrument on a channel followed by Polarity-Recorder. For example:
- Load a virtual instrument such as Pianoteq.
- Insert Polarity-Recorder after it.
- Record or play notes.
- Select the captured section in the ring buffer.
- Drag out either:
- the audio
- the MIDI performance data
The result is a recovered performance that includes both the rendered sound and the original note information.
Even if the MIDI notes are not displayed directly in the waveform view, the note data is still stored underneath and written to disk during export.
Auto Sampler Workflow #
A practical auto-sampling workflow looks like this:
- Switch the recorder from ring recording to Auto Sampler mode.
- Name the sample set.
- Configure the gate so the recorder knows when a note has decayed enough to stop recording, then click ARM.
- Play a note into the source instrument.
- Release the key.
- The plug-in captures the note, trims it based on decay, and assigns the sample a name based on:
- MIDI note
- velocity
- round-robin count if needed
For more systematic multisampling, a note clip in the DAW can be used instead of manual keyboard playing. This allows precise control over:
- which notes are sampled
- which velocity layers are captured
- how densely the instrument is sampled across the keyboard
That setup requires some preparation, but it can then be reused for other instruments.
Practical Uses #
The update makes Polarity-Recorder useful for several sampling and production tasks:
- recovering spontaneous performances from a recent ring buffer
- exporting both audio and note data from virtual instrument recordings
- creating multisampled instruments
- building velocity-layered sample sets
- capturing round-robin variations
- generating lower-resolution samples directly from the source using reduced bit depth settings
Limits and Current Status #
The plug-in version is currently the main focus and the most fully supported environment.
A standalone version exists and appears to work in some cases, but not all features have been fully tested there, especially MIDI functionality. The MIDI-related workflow described here should be considered reliable inside the plug-in context rather than guaranteed in standalone use.
Operating system compatibility is intended across major platforms, including macOS and Windows, but installer and security-signing behavior may vary by system. Unsigned installers or plug-ins may trigger operating system security warnings depending on platform settings.
Availability #
The update is live and remains free to download from:
polarity.productions/polarity-recorder
Transcript #
Click to expand transcript
Automatically transcribed; obvious technical-name errors corrected. Spoken repetitions retained. Not a fully human-verified verbatim transcript.
0:00 Yo folks, welcome back. I want to give you an update on Polarity-Recorder my free-to-use ring recorder that you can use inside a DAW and
0:08 Outside of a DAW
0:10 And there are some new features and it's still free the update is live so you can head over to my website here polarity dot
0:17 productions slash Polarity-Recorder and
0:20 Download this for free. So the first new feature is we have now MIDI history and export
0:27 Which means if there is some kind of MIDI come coming into the plug-in when you maybe record a synthesizer
0:35 In a DAW then this MIDI is saved or stored alongside the audio
0:41 So you can also export the MIDI data or the note data if you want to do that then there's a new auto sampler
0:48 Feature which means you can switch the ring recording to and sampler recording and you can play then
0:57 Some notes on a piano right and if you have a piano
1:01 Sampler piano plug-in inside of a channel then you can record with the note data
1:08 And then store automatically the notes with the note data and with
1:13 Velocity data. I'll show you this in a minute
1:16 Then there is here the history bit depth
1:19 so you can also choose now between 8 bits 12 bits 16 bit or 24 bit PCM or
1:25 32-bit float if you want to store this in
1:28 The one or the other format. I thought it's maybe interesting to have 8 bits in here to have some old school
1:36 sampler feeling from the start from the beginning and
1:40 Yeah sampler folder setting you can now choose where you store or where you want to store
1:47 The samples or the ring recorder when just when you hit save, right? Where are these files stored?
1:54 So this is new in the new version
1:56 I know a lot of people want to use this without the DAW
2:00 So they want to use it as a standalone which kind of works, but there are some flaws
2:04 Not everything works. I haven't tested the MIDI functionality right now with the standalone
2:12 So
2:13 Yeah, hold your horses. It's coming right. It's just not tested
2:18 But it's working inside of the plug-in. So I show you this here in a minute. Okay
2:24 So inside of Bitwig here
2:26 We have just your one channel and we have a Pianoteq plug-in where I want to play the piano, of course
2:33 And after this we have the Polarity-Recorder and I just can hit here
2:39 record and
2:42 Play some notes and of course we have here the notes in there right or we have the
2:53 The sound of it in here what we can do now is we can select this portion and we can drag the MIDI out
3:00 so we have here
3:02 Basically all the note information
3:05 Also stored alongside the audio and of course you can drag out also here the audio, right?
3:14 So we have the audio and
3:20 So it's playing it Pianoteq and also the sample so it's stored in the ring buffer
3:27 So we can just drag out whatever you want or you just save both and also here inside of them
3:35 Get temporary or the the store folder. You also store
3:40 The MIDI files so I can show you this so this is here my folder
3:45 It's temporary Polarity-Recorder follow and you can see here. We have a MIDI file and we have a WAV file
3:51 So nothing is
3:53 Lost so every time you export a WAV file or you save a WAV file. You also more or less get the MIDI file
4:00 It's not shown in here. So there are no notes shown, but it's stored underneath
4:06 Just for the first iteration. Maybe I do a separate kind of visual here for the notes, but at the moment it just works
4:14 So that's that then we have something here
4:17 Some features people wanted there are some settings now so you can see here there's a zoom in while selecting or trimming some people are
4:30 Didn't like how this kind of mini map here worked when you record sounds
4:42 And you want to select something you can do this now and now it doesn't zoom in when this is enabled
4:49 Then you select something and then it automatically zooms in and some people didn't like that. So we can change this here
4:57 Then there's also your something like keep metadata for new clips
5:02 So every time you save or you create a new selection in here all these metadata
5:09 drop-downs are reset and for me sometimes it's a bit annoying because you want to save, you know a
5:16 few percussion sounds and
5:19 Then you have to select here every time the same thing which is annoying
5:24 So you can switch this off or on however you like it, right?
5:28 Then it's also here the ring buffer a bit depth and you can select us here 8 bit up to 32 bit float
5:35 And here's the sample directory of course that you can define for yourself
5:40 If you install this here
5:43 you have to be
5:46 Maybe make sure you you back up your initial or your first default
5:53 Clip folder or maybe just point then here
5:58 The sample directory to this old folder. I think it's a completely a different one
6:04 Anyway, so this is this these are some new features and I want to show you now here the
6:10 Autosampler so there's now here this drop-down
6:12 called auto sampler and
6:16 Maybe I can I clear this here? Yeah
6:20 So the auto sampler works a bit differently you can still see here the ring buffer in the background running
6:26 But what we can do now is we can say we have here piano
6:34 Piano sampling
6:36 Whatever you want to call call it then we have here some gate settings
6:41 So when you play a note usually it rings out that's the reverb on it, right?
6:45 And then it this plug-in waits until the reverb rings out and goes below a certain DB
6:52 Value and then it cuts off the sample so we can arm this now and we have the Pianoteq here in place, right?
7:00 We can play it. So all we have to do now is play a note. So let's say I play C here
7:08 And then I release the key
7:12 Right and then you can see we have here a new sample and the interesting part is maybe I should zoom in there
7:19 Interesting part is we have automatically the right note because it can just take my MIDI note and
7:26 Also the right velocity and if it's the same note in the same velocity we have here this round robin
7:32 Number at the end here. It's zero zero one. Okay, so we can save multiple
7:38 Notes with the same velocity in the same note number and it's still giving you a
7:44 different sample name
7:56 So
7:58 It's very easy to create
8:01 Multi-sampler patches for Bitwig or for Kontakt or whatever you want to use it
8:08 Probably the best way to do this is not instead of using keyboard you just create here a new note clip and then you
8:17 create
8:19 You know a note for C
8:21 To a note for C3 a note for F and so on how how much you want to
8:27 Create and of course every note gets a different velocity setting and so on it's a bit of
8:33 Setup, but you can save it and use it later for other instruments and you can define for yourself
8:40 how fine grained you want to
8:43 resample certain instruments, okay and I use this here a lot for
8:49 Multi-sampler patches inside of Bitwig studio. It's very easy very straightforward and some people wanted to have this
8:56 And I think it's a great addition to the plug-in because it's all about sampling and
9:00 Yeah, it's the auto sampler feature
9:04 Okay
9:06 Let me know if if it works if you run into problems or bugs I can fix it of course like I said at the beginning
9:12 The standalone version gets some love in the future of course, but for now I'm
9:19 Completely focused on the plug-in because that's where I use it the most and
9:24 Yeah, it also
9:26 Also have this year. There's this new scaling feature in there, which all my plug-ins get now
9:32 Okay, let me know what you think in the comments down below
9:34 The update is live on my web page here. I give you the link in the description and
9:40 Yeah, let me know it works on all systems by the way
9:43 Or I try to make it work on all systems. You know, macOS, Windows. On macOS, of course, there is always the problem with the
9:51 Guardian with the file guard or whatever the name is I always forget the name
9:56 It's very stupid, but also windows has now something like this and you need to I need to sign basically that the installer and
10:05 The plug-ins, but it costs a lot of money. I'm not sure if I should make it
10:10 But we will see
10:13 Anyway, that's it for today. Let me know what you think and I see you in the next video. Bye