Music Production Knowledge Backlog
Here you can browse the latest published tutorials, guides, tools, articles, music posts, videos, and releases in one timeline. If you want a smaller overview, start with Polarity Music tutorials, Bitwig guides, Building Bitwig Grids, helpers, articles, music videos, releases, or the music hub. If you want something specific, use the search.

Welcome to Interactive Piano Chords! This web app allows you to explore various piano chords, visualize them on a virtual keyboard, and even hear how they sound. Click on a chord from the list to highlight its notes on the keyboard and play its sound. You can also see how many notes each chord shares with the currently highlighted chord. Enjoy your musical journey!

In this video, I show how to create interesting sounds and soundscapes using tones and wavetables. I primarily use Bitwig Studio and Serum, but just the wavetable editor in Serum. I demonstrate how to manipulate the wavetable by drawing in different wave shapes and randomizing certain partials. I then export the wavetable and import it into Bitwig Studio's wavetable oscillator. Using the wavetable oscillator, I create a motif by randomizing pitch steps and applying pressure and timbre modulation. I also incorporate effects like convolution reverb and delay to enhance the sound. I then explore using the polygrid to create more complex sounds by drawing in sign partials and modulating them over time. Finally, I use the polygrid to create a pad sound by combining sign partials, applying ADSR envelopes and filters, and adding effects like delay and chorus.

Over the years, I've picked up a valuable rule of thumb that's relevant not just in music production, but in many areas of life as well. The essence is this: every action you take involves a trade-off. Take sound mixing, for instance. If you crank up the volume on one track, you're inevitably going to drown out the others. Make everything equally loud, and you lose the elements that should stand out. Plus, boosting the volume too much can sacrifice the dynamics and transparency of the whole mix. So, it's all about finding that perfect balance, that sweet spot where you're giving up just enough to achieve the result you're aiming for.

The person in the video talks about a German saying that if you want something, you find ways, and if you don't want it, you find reasons. They apply this saying to their music productions and explain that instead of buying new plug-ins or gear to solve their problems, it's better to find a solution using what they already have. They believe it's important to get to the root of the problem and solve it rather than relying on new purchases. They suggest viewing new plug-ins and gear as fun toys to play with rather than problem solvers.

Convert BPM to milliseconds and Hz with note division tables, plus compressor attack/release and delay time tips for any DAW.
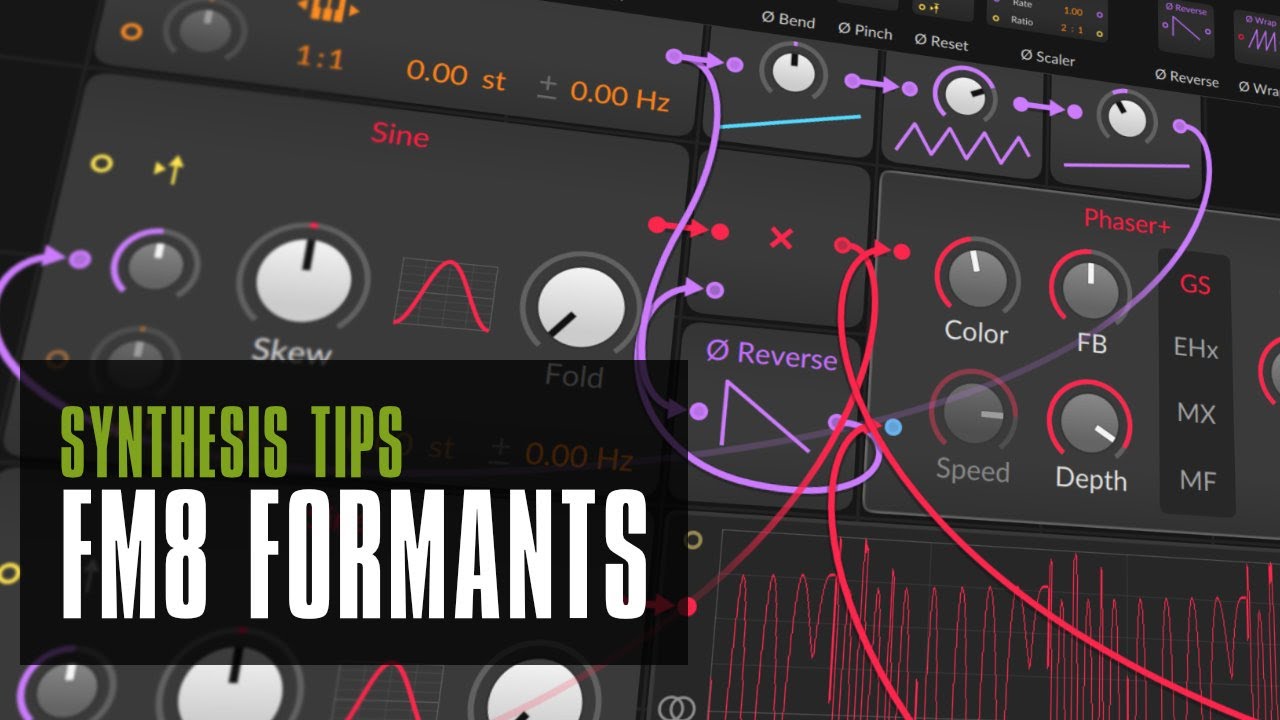
In this video, I talk about my journey of using FM8 for bass lines and how I incorporated that knowledge into using the Scroll in the Grid. I explain how I used one oscillator for a pure sine bass sound and another oscillator with different wave shapes to create overtones. I show how you can recreate these sounds in the Grid by using formant wave shapes and modulating them with a sine oscillator. I demonstrate the use of filters and phasers to further modify the sound. Overall, I discuss how this journey of experimenting with different techniques allowed me to create interesting and unique bass patches.

In this video, I talk about some small changes I would like to see in future versions of Bitwig Studio. I acknowledge that Bitwig Studio is already amazing and I have no complaints about it. However, there are some features that I think could be improved upon. One feature I feel needs some love is the recorder module in the grid. It lacks persistence, meaning that when you save and reload a preset or project, any recorded data is lost. I suggest adding a feature to persist data or introduce a module similar to the sample and hold that can save values.
The video advises against overthinking and encourages taking action instead. It suggests that starting something and not worrying about the outcome is important. If I don't like what I've started, I can simply start fresh and try something new. The process of doing, practicing, and gaining new information can lead to improvement over time. Eventually, I may even realize that what I had initially thought was not so bad after all. The key takeaway is to take action and avoid overthinking.

In this video, I discuss how to learn and understand the grid in music production. Many people have misconceptions that taking a course will make them a professional musician, but that's not how it works. A course can provide the basics, but real learning happens through trial and error, researching and experimenting. I explain that it's important to overcome problems on your own and develop problem-solving skills. It's not about memorizing individual modules, but rather understanding how to use them in different contexts. I emphasize the importance of researching online, reading the manual, and exploring different resources to gain knowledge. I also share my own process of learning, documenting, and experimenting with patches. Learning music production is an ongoing process that involves constant learning and building experience.

Discover the art of crafting drum & bass in Bitwig. In this tutorial, we delve into setting the pace at 170 BPM, a typical drum & bass speed, and explore the intricacies of loop creation. We also introduce a custom grid patch named 'Drum & Bass Drums' and demonstrate its sound dynamics. While the patch is available on Patreon, alternatives like random drum bass loop wave files can also be used. The tutorial emphasizes the importance of modulation, the use of different synthesizers for unique bass sounds, and the strategy of building an arrangement progressively. By the end, with minimal compression and limiting, we achieve a deep roller track that's loud and clear. For those interested, the drum preset will be available on Patreon, and there's a possibility of a full track release on Bandcamp in the future.

In today's video, I want to discuss melodies, chords, and scale highlighting features. Somebody commented on my previous video about using a note grid that emits random melodies and modifying it with a key filter to accommodate those who are less familiar with music theory. However, I believe this approach is not feasible because the scale highlighting feature in Ableton Live, for example, can be misleading. When you select the scale feature in Ableton Live, it highlights certain notes in green. For C major, all the white keys are highlighted. However, it also selects other scales and modes such as D Dorian, E Phrygian, and so on.

In this video, I start with a completely empty project in Bitwig Studio and build a track from scratch. I start by creating a loop with a melodic kick drum using a Grid patch. I then add variation to the pattern by using a note delay effect. Next, I add hi-hats and claps using the E-Hat device and XO plugin. I create a drone sound using PianoTek and Supermassive, and then add melodic lines using the Polymer synth and a note grid step sequencer. I also use various modulators to add movement and variation to the melodic lines. Finally, I create a bassline using the Polymer synth and apply sidechain compression to the bass and the entire music bus.

Hello there! I'm excited to share my latest track, which I created using the versatile Bitwig Studio. Throughout the process, I ...

In the video, I showed how to make music in Bitwig Studio using global modulators. I used two step modulators, one for values and one for melody. I connected them to a polymer synthesizer and routed them through a node grid. I used the values from the step modulator to modulate various parameters in the synthesizer, such as decay time, amplitude envelope, and mix levels. I also used the melody step modulator to generate notes and trigger them using clock and XOR modules. I demonstrated how changing values in the step modulators can instantly modify the sound and trigger different sequences. Overall, it was a fun and nerdy way to create music in Bitwig Studio.

In this video, I demonstrate how to create a trumpet or saxophone sound in Bitwig's grid using subtractive synthesis. I avoid using samples, wavetables, or physical modeling. The sound is shaped using pinch and bend modules, as well as a phaser, before going through a filter and an amplitude modulation module. I also add filtered noise to simulate the air going through the horn. To simulate the characteristics of different instruments, I use fixed frequencies in an EQ module. An impulse response and delay are used to simulate room and add space to the sound. The main trick of the preset is shaping the phase signal with pinch and bend modules, which creates trumpet-like harmonics from a sine wave. I use Bitwig's expression modulator to map timbre, pitch bend, and pressure to add expression to the sound. I show how to do this in a separate polygrid. It took some time to find the right modulation amounts and timings, but the result is a cool and realistic trumpet sound. The preset is available for Patreon and YouTube subscribers, while others can try out the techniques I demonstrated.

You can easily copy all modulation routings and their specific amounts from one modulator to another in Bitwig by right-clicking the modulator handle, selecting copy, and then pasting it onto a new modulator. Similarly, you can synchronize parameter values or modulation mappings across all layers by right-clicking a knob and choosing either copy value to all layers or copy modulation to all layers. For multiple modulators, hold Alt to select them, then drag with Control to move or duplicate them while retaining or copying all their mappings, streamlining complex modulation setups.