FX Grid - Building Audio Effects
So far in this course we built note tools in the Note Grid and instruments in the Poly Grid, from subtractive all the way to physical modeling and self-running patches. Now we switch to the third Grid device: the FX Grid.
The FX Grid does not generate sound. It receives audio that already exists, for example from an instrument, an audio track, or a recorded sample, and processes it. We covered the three devices back in chapter 003; this lesson is where we actually use the FX Grid for the first time.
What Is Different About the FX Grid #
The modules are exactly the same as in the Poly Grid. What changes is how the device sits in the signal flow and a few defaults.
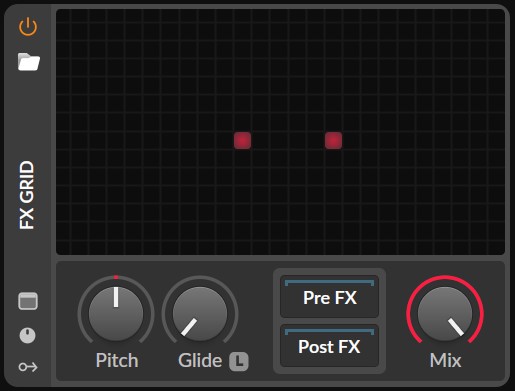
- Audio comes in from outside. Instead of starting with an oscillator, you start with the audio that enters the device. The FX Grid gives you an Audio In module for that signal.
- It is monophonic by default. A Poly Grid spins up a new voice every time you press a key. An FX Grid just processes the incoming audio stream, so there is no gate and no per-note voice unless you specifically build that. For most effects this is exactly what you want.
- There is a Mix knob. The device layout has a Mix control that blends the dry (original) signal with the wet (processed) signal. This is the dry/wet you know from normal effect plugins, and you get it for free without wiring it yourself.
- Pre-FX and Post-FX chains. Like the other Grid devices, the FX Grid has chain boxes so you can place other Bitwig devices or plugins before or after the Grid.
Audio In and Audio Out #
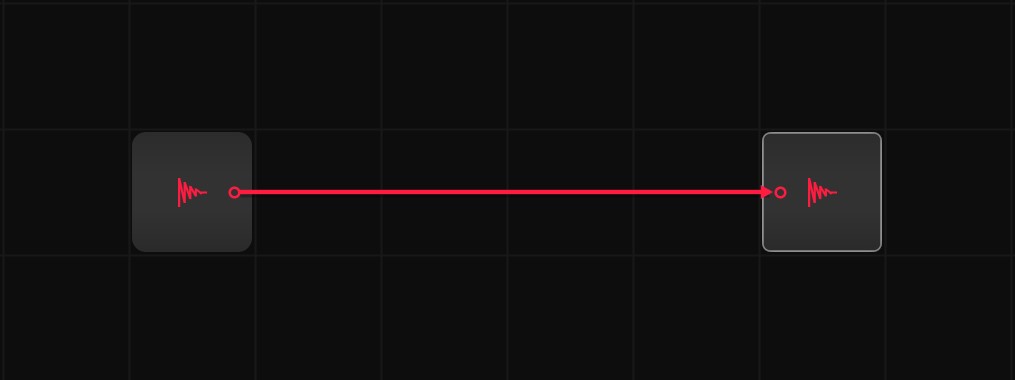
Every effect you build has the same skeleton:
Audio In -> (your processing) -> Audio Out
The Audio In module is the entry point for the signal coming into the device. The Audio Out module is the exit point that sends your processed signal back into the track. Everything you do, filtering, distortion, delay, reverb, happens between those two modules.
If you connect Audio In straight to Audio Out with nothing in between, the device passes the sound through unchanged. That is your starting point for every effect.
Build a Small Drive Effect #
Let's build the simplest useful effect so the workflow becomes concrete: a drive/saturation that adds harmonics and grit.
- Add an FX Grid on an audio or instrument track that already makes sound (maybe use a drum loop).
- You should see an Audio In and an Audio Out module. If not, add them.
- Add a Distortion module between them. (just drag the module to the Audio In output jack)
- Raise the input gain on the Shaper so the signal pushes into the curve. You will hear it start to saturate and distort.
- Optionally add a Low-pass Filter after the Distortion to tame the harsh highs that distortion adds.
Use the Mix Knob #
Turn the device's Mix knob down from 100%. As you do, you blend the clean original signal back in underneath the distorted version. This is parallel processing: you keep the clarity and transients of the dry signal while adding the weight and harmonics of the wet signal on top.
This single knob is one of the biggest reasons the FX Grid is comfortable to work in. You do not have to build a dry/wet crossfade by hand for every patch; the device gives it to you.
Tip: many effects sound better at less than 100% wet. Distortion, reverb, and chorus in particular often want a blend rather than the fully processed signal.
Why This Matters #
Once you are comfortable with Audio In, Audio Out, and the Mix knob, you can build almost any effect. The pattern is always the same: take the incoming audio, process it between the two modules, and blend to taste. Filters, bit-crushers, distortion, delays, and reverbs are all just different things placed in that gap.
If you want to see how far this goes, I have a whole video on building your own audio effects in the Grid, and another where I rebuild Bitwig's Delay+ inside the FX Grid. For the drive example above, the Saturator topic hub collects more on wave shaping and saturation.
In the next lesson we put this to work on a bigger build: a reverb made from all-pass delays, where the timing relationships between modules decide whether you get a smooth diffuse tail or an obvious echo.
▶ Next Lesson: FX Grid: All-Pass Reverb
◀ Previous Lesson: Poly Grid: Self Running Patches
▲ Bitwig Grid Course Overview