Space Ambient in Bitwig 6
Tutorial | Jan 26, 2026
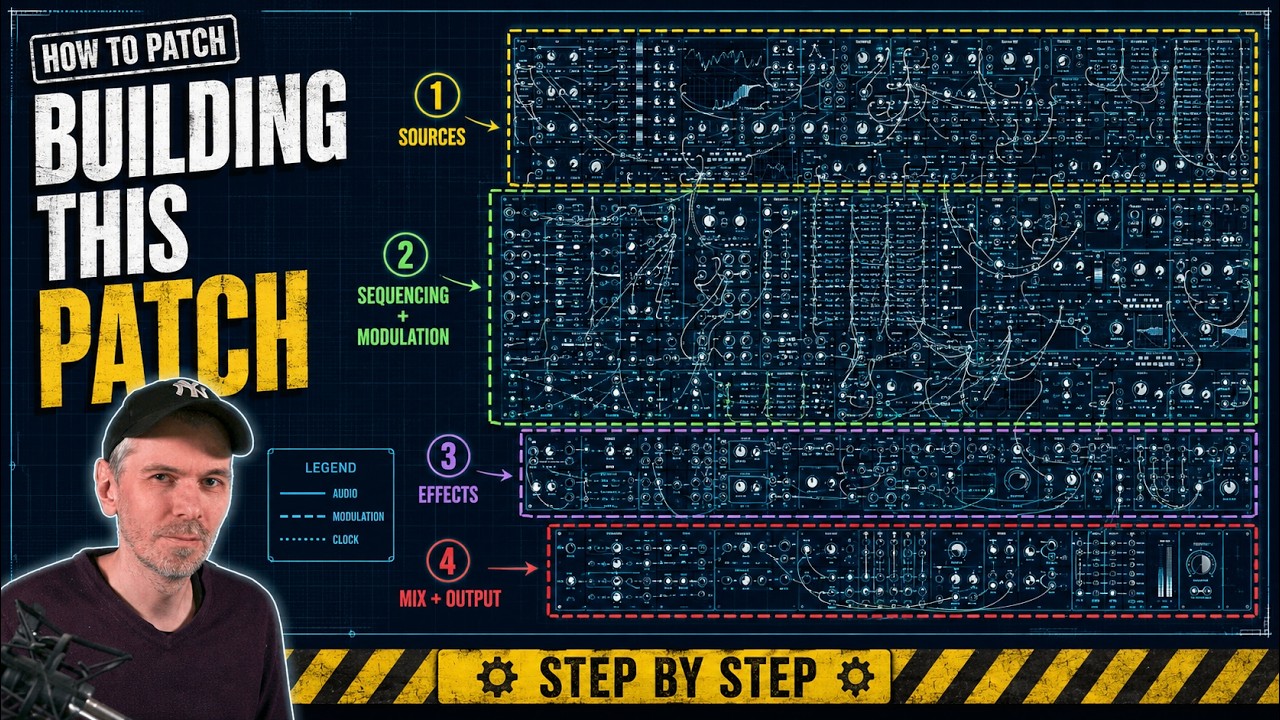
This video explains how to easily create lush, spacey ambient drone music in Bitwig Studio using the Grid, focusing on stacking sine oscillators tuned to the root, fourth, and fifth notes of a scale with voice stacking, modulation, randomization, and effects like reverb and chorus. The presenter demonstrates building evolving harmonies and textures, adding sampled keyboard sounds and a simple bass, and shows how to keep everything musical while allowing flexible sound design. The result is a rich ambient soundscape perfect for long YouTube videos, with a workflow that can be adapted and expanded creatively.
You can watch the Video on Youtube
- support me on Patreon
- download the Project
Short Overview #
In this video, I show you how to create space station-style ambient music using Bitwig Studio and the Grid. I walk through building lush drones with evolving movement, stacking simple sine oscillators on the root, fourth, and fifth notes for a rich harmonic base, and adding random modulation for organic variation. I also layer in atmospheric textures and melodic elements, apply generous reverb and effects, and even drop in a bassline to round things out. This method is straightforward but gives you endless creative options to craft your own ambient soundscapes.
- Overview of creating ambient space station-type music with Bitwig Studio in The Grid
- Starting with a sine oscillator and amplitude envelope for pure drone sounds
- Explanation of pad sound creation and why filtering is used with saw oscillators
- Use of voice stacking to add root, fourth, and fifth notes in different octaves
- Approach to keeping harmonies correct using quantization and root-module techniques
- Dynamic control of individual voice volumes, ensuring the main note is most prominent
- Addition of reverb for spacious, ambient feel
- Use of random modulators per voice to introduce subtle movement and variation
- Further modulation for timbral changes (skew, fold, detune) on each voice
- Demonstration of self-resonance and phase modulation for added depth
- Use of chorus for extra movement and width in the sound
- Showcasing flexibility by changing root notes while keeping intervals consistent
- Addition of subtle textures using Bitwig’s sampler and randomized sample triggers
- Use of further effects like delay, EQ, and filtering for enhanced ambience
- Basic bass creation using a detuned saw patch, keeping it simple with options to add reverb
- Advice to experiment with layers and synthesizer settings for unique results
- Encouragement to use or share the patch as a starting point for personalized ambient tracks
- Emphasis on how easy and flexible it is to create ambient drone music in Bitwig Studio
Introduction: Making Ambient Drone Sounds in Bitwig Studio #
I recently watched a popular YouTube video featuring space station visuals paired with ambient music. The sound is characterized by a drone and layered musical bits with lots of reverb. These kinds of videos are everywhere on YouTube and people love how atmospheric and relaxing they are. Inspired by this, I want to walk you through how you can easily create these ambient drone sounds yourself using Bitwig Studio’s Grid. Even if you’re a beginner, you’ll see it’s not very hard.
Setting Up the Project in Bitwig Studio #
To start, I open a new project where I only have a Poly Grid device and a spectrum analyzer so I can visualize the sound. The core sound begins with a sine oscillator and an amplitude envelope. Unlike traditional pads made with saw oscillators that require filtering to achieve a soft sound, I use a sine oscillator for its pure tone and then morph and stack voices to build complexity.
Why Sine Oscillators for Drones? #
Sine oscillators are the simplest waveform, producing a clean, pure tone with no overtones. In contrast, saw wave oscillators contain many harmonics, which require filtering to soften for ambient soundscapes. By shaping and stacking sine waves, I can build that lush ambient drone in a more controlled way.
Stacking Voices for Richness #
The next step is stacking multiple voices. Typically, this involves duplicating oscillators at different pitches, but instead I use Bitwig’s voice stacking feature for flexibility. By spreading the voices, I create the lush, moving sound characteristic of drone music.
Using Scales and Quantization #
I want my drone to consist of the root note, the fourth, and the fifth of a scale, such as E flat minor, but just stacking notes manually is tedious and not very flexible if I change the key. Bitwig’s grid lets me use a ‘root’ module to easily change keys globally and quantize voices to the right notes. This technique allows the drone to always play only the desired notes, regardless of which scale I choose.
Controlling Dynamics Across Voices #
By default, each stacked voice is equally loud, but for a more natural sound, I want the lowest note (the root) to be the loudest, and the higher voices to fade out in volume. I use a modulator that dynamically adjusts the volume based on each voice’s pitch position, making higher harmonics softer. This creates a balanced and pleasing drone sound.
Introducing Movement and Randomness #
To enhance the organic quality, I modulate each voice’s volume with a slow random modulator. This causes voices to gently fade in and out, giving a sense of subtle, ongoing motion. The random modulator in Bitwig can be set to operate per voice, and by smoothing the modulation, I get slow, musical movements rather than abrupt fluctuations.
Voice Detuning and Additional Texture #
Perfectly tuned voices can sound sterile, so I introduce small pitch variations using random and value modulators. This gentle detuning mimics real-world instruments and thickens the sound. Extra effects like chorus, delay, and reverb are added for further movement and depth, transforming the basic drone into a lush ambient pad.
Adding Melodic and Textural Layers #
Now that the harmonic drone is set up, I add higher layers for more interest. On top of the background drone, I use Bitwig’s sampler with key samples from a classic Triton keyboard. I randomize sample selection and envelope parameters to create subtle, shifting sound fragments that float over the base drone. These notes can be played manually or sequenced, and because the sample choice is randomized, the top layer is always evolving.
Processing the Texture Layer #
To glue everything together, I apply the same reverb and sometimes more delay to the melodic layer, keeping it airy and blended into the overall mix. High-passing and EQ cleaning help prevent muddiness, ensuring clarity while maintaining depth.
Adding a Bass Foundation #
No ambient drone is complete without some kind of low-end anchor. I use Bitwig’s Polymer synth with a detuned saw wave oscillator for the bass. The bass is set to monophonic with some additional processing and reverb to make it blend yet stand out enough to support the ambient structure.
Creative Variations and Tips #
Bitwig’s modular approach lets me swap out the fundamental sound sources, try different scale structures, or introduce self-resonance by routing delay feedback into modulation inputs. Each variation offers new timbral possibilities, and by tweaking randomization amounts or effects, I can create endless unique backgrounds fit for streaming, relaxation, or creative videos.
Why This Approach Works for YouTube #
Millions watch these ambient videos, partly because the sounds are soothing, immersive, and great for background listening. By using this method, you can make similar content and possibly attract a wide audience. The techniques here are simple but highly customizable, making this a great foundation to build your own ambient music.
Conclusion #
By starting with a sine oscillator, stacking voices, and using careful modulation and effects, you can produce rich, layered ambient drones quickly in Bitwig Studio. Dynamic and melodic textures add interest, and a soft bass gives grounding. This method is a flexible starting point for any ambient project, whether you’re aiming for relaxing music or space-inspired soundtracks. The project can be downloaded or reconstructed easily, as the core method is straightforward yet infinitely expandable with your own creative ideas.
Full Video Transcription #
This is what im talking about in this video. The text is transcribed by Whisper, so it might not be perfect. If you find any mistakes, please let me know.
You can also click on the timestamps to jump to the right part of the video, which should be helpful.
Click to expand Transcription
[00:00:00] So I came across this video here on YouTube.
[00:00:02] It's a space station or an image of a space station.
[00:00:06] And in the background, you can hear some ambient music.
[00:00:08] It's just a drone sound with some musical pieces on top.
[00:00:12] And it has a lot of views.
[00:00:13] A lot of people love this kind of sound.
[00:00:16] And there are probably millions of these videos on YouTube.
[00:00:19] So I thought it's maybe a good idea
[00:00:21] to give you some tips and tricks
[00:00:22] how to do this in Bitwig Studio very easily in the grid
[00:00:25] because it's not very hard.
[00:00:27] I give you here an idea how it sounds
[00:00:29] just to not get flagged.
[00:00:31] It's like this for one hour.
[00:00:40] So just a drone sound and then a lot of movement,
[00:00:43] a lot of musical bits on top.
[00:00:46] Just, you know, with a lot of reverb.
[00:00:48] So that's basically it.
[00:00:49] So in Bitwig, you can do this pretty easily here.
[00:00:52] I have nothing in the project here.
[00:00:55] Just a pulley grid and a spectrum analyzer
[00:00:57] so you can see what I'm doing.
[00:00:59] And we start here with the sine oscillator
[00:01:02] and then amplitude envelope.
[00:01:04] And we don't need to go for a saw oscillator here
[00:01:09] because usually these pad sounds are made with saw leads.
[00:01:14] I'll show you this here, what I mean.
[00:01:17] Go down here one octave.
[00:01:20] This is how it looks like with a saw, right?
[00:01:25] A lot of overtones.
[00:01:26] And then you usually go for a low pass filter
[00:01:29] and filter everything away on top.
[00:01:33] And then you play with the movement.
[00:01:41] But what I do is I go for a sine oscillator
[00:01:45] without the filter because the sine oscillator
[00:01:48] is just pure.
[00:01:49] And then you can use this cue.
[00:01:53] (machinery buzzing)
[00:01:56] To make it to a saw with all the overtones.
[00:02:00] So it's basically just a saw with the filter
[00:02:03] just in one device for me, at least.
[00:02:06] Okay, that's it.
[00:02:07] So what we want to do is we want to stack now
[00:02:09] a lot of these oscillators here
[00:02:11] just with root note or with the root note of our key.
[00:02:15] And I want to use the fourth and the fifth,
[00:02:20] but in different octaves.
[00:02:22] Just one octave multiple octaves.
[00:02:25] Okay, so you can do this pretty easily
[00:02:27] but just maybe cloning here the oscillators
[00:02:31] many, many times.
[00:02:33] But we can also just use voice stacking.
[00:02:36] So that's what I do at least.
[00:02:38] And yeah, so we start by using actually a pitch.
[00:02:42] So we want to use a pitch for our key
[00:02:45] and we use here EB minor.
[00:02:47] So instead of using the pitch module
[00:02:51] and dialing in here this manually,
[00:02:54] we go for the root module, looks like this,
[00:02:58] which gives us basically what we dialed in here
[00:03:00] on the top, the global selector, right?
[00:03:02] So it's EB, maybe E can see it switches to E or F sharp
[00:03:07] and so on.
[00:03:08] So we can just use this and as an input.
[00:03:11] We also want to go lower in pitch
[00:03:17] because we're on D sharp three.
[00:03:19] So we can select here on the left side
[00:03:21] when we select the module and we can say here,
[00:03:23] go to maybe one octave one.
[00:03:25] We are in this kind of range.
[00:03:29] Then we want to stack actually multiple voices.
[00:03:32] So we go here maybe for six
[00:03:35] and we use a stack spread modulator
[00:03:40] and we go for value.
[00:03:43] And then we can use here the ratio knobs.
[00:03:46] It sounds like this.
[00:03:48] (electronic music)
[00:03:51] But with this, the problem is we end up
[00:04:00] on all kinds of different notes and frequencies,
[00:04:04] but we only want to hit the root note,
[00:04:08] the fourth and the fifth.
[00:04:09] Okay, so how do we do this now?
[00:04:11] We can just use a quantizer, right?
[00:04:17] And then use the root note,
[00:04:22] the fourth and the fifth of the scale.
[00:04:26] But the problem now is when we switch here this to E,
[00:04:29] this, it doesn't fit anymore.
[00:04:32] Yeah, every time you basically switch here this,
[00:04:34] we have to switch also here these knobs,
[00:04:39] all these buttons to fit actually your current scale,
[00:04:43] which is a bit tedious.
[00:04:44] It works, but it's tedious.
[00:04:46] We also have your by scale, this kind of thing,
[00:04:49] but it also targets all of the notes of the current scale.
[00:04:53] This is also not what we want.
[00:04:54] We only want to target three different notes
[00:04:57] from each scale and these are all always different
[00:05:01] in each scale.
[00:05:02] So we can do something very easy with this.
[00:05:06] We just unhuck this here, disable this basically.
[00:05:14] So we use an ad and we want to add the pitch here.
[00:05:19] We actually do this here in one scale
[00:05:25] and this is the C major scale.
[00:05:28] And we use a ratio in front like this.
[00:05:33] And then we say, oh, this is C major now.
[00:05:36] So C major, this is the root.
[00:05:38] Then we have one, two, three, four, five, six, seven.
[00:05:42] We have the fourth and the fifth here in the root.
[00:05:45] And then we add this to this, put these two together.
[00:05:50] Maybe this is better because C three is always zero.
[00:05:57] So we don't need an input here because the input is zero.
[00:06:01] So zero is C three.
[00:06:03] So you don't need to have an input.
[00:06:06] And then we get here all the offsets, offset values, right?
[00:06:12] So here this is zero, then this is probably, I don't know,
[00:06:16] zero dot zero three or something like this.
[00:06:18] And then we use this root note here as an offset.
[00:06:22] So we move it up or down on the keyboard, on the scale.
[00:06:27] So we offset this.
[00:06:28] So we can change this here and we are still using
[00:06:31] the pitches or the offsets here for the notes.
[00:06:34] I hope this makes sense in a way to you.
[00:06:37] I can show you this in a minute.
[00:06:40] So we use value slider here.
[00:06:42] So instead of modulating this,
[00:06:43] we modulate actually this here in the C major scale.
[00:06:46] And it sounds like this.
[00:06:49] Then again, add some notes.
[00:07:06] And now you can see that all these overtones
[00:07:10] here are actually louder than the initial pitch,
[00:07:13] which is not what we want.
[00:07:14] We want to have this the loudest and this is the quietest.
[00:07:17] So it's actually the opposite way around.
[00:07:20] So we can use the value slider here and say,
[00:07:22] the more we go up in pitch,
[00:07:25] the more we go up in pitch, the more we go up in voices,
[00:07:29] the lower we want to go with the volume.
[00:07:32] So we bring in here a DB slider like this
[00:07:37] and then we modulate this down, right?
[00:07:40] We use this value.
[00:07:41] The higher we go in voice,
[00:07:45] the lower we go with the volume.
[00:07:46] I maybe use a different one here.
[00:07:53] Maybe if this one ranges much, much higher.
[00:07:59] Okay, maybe add some voice stacks here.
[00:08:04] So we can tweak the slider on here much better.
[00:08:19] So now that we have these stacks
[00:08:21] and all of these stacks are actually only the root,
[00:08:25] the fifth and the fourth,
[00:08:26] and we can now change here the initial root key
[00:08:30] and everything is on point.
[00:08:33] Perfect.
[00:08:40] So we can change the key and everything stays in place.
[00:08:44] It's exactly what we want.
[00:08:46] So now we can also add maybe your reverb.
[00:08:48] So I'm going for a super massive,
[00:08:54] all the way up, density here,
[00:08:57] and it probably already sounds very ambient-ish.
[00:09:00] Let's tweak this a bit.
[00:09:09] So again here,
[00:09:24] we can already bring in some movement
[00:09:26] just by modulating here the volume.
[00:09:28] So what we do now is we want to modulate the volume
[00:09:31] of each voice.
[00:09:32] We want to have go this down and up
[00:09:34] and this up and down, right?
[00:09:36] So very randomly.
[00:09:38] We can do this easily by just adding here a random modulator.
[00:09:43] And this random modulator is already in per voice mode,
[00:09:46] as you can see on the left side.
[00:09:48] So on each voice, we get the value
[00:09:53] and you want to smooth this here.
[00:09:54] So it's slowly moving
[00:09:56] and you want to maybe have this moving over four bars
[00:10:01] very slowly.
[00:10:02] And we use this to go down in volume here.
[00:10:06] So now each partial is
[00:10:13] randomly moving slowly up and down in volume.
[00:10:20] (gentle music)
[00:10:22] So let's play around here with a ratio setting.
[00:10:33] Yeah, let's go actually here to
[00:10:49] three.
[00:10:50] So this is the highest setting we want to go.
[00:10:54] And now we can use a macro button here
[00:10:57] and just modulate the amount of this,
[00:11:03] of this maximum three.
[00:11:05] So with this now we can go from,
[00:11:09] only use one partial to
[00:11:18] yeah, use a different spreading.
[00:11:21] So we use a random modulator here.
[00:11:27] Maybe we switch this to monophonic
[00:11:31] and we say bar and we say every four bars
[00:11:35] or maybe every five bars,
[00:11:38] we switch to a different value
[00:11:41] and this is then a different spread setting.
[00:11:43] (gentle music)
[00:11:46] (gentle music)
[00:11:48] And because it's very
[00:11:58] abruptly changing from one chord to the other,
[00:12:03] maybe we can bring in here a lag.
[00:12:05] So it's slowly moving the notes
[00:12:14] from one point to the other.
[00:12:16] Can you hear it?
[00:12:24] (gentle music)
[00:12:26] Are you a bit slower?
[00:12:36] I don't know.
[00:12:37] It depends on what you like.
[00:12:44] Or maybe it's too slow.
[00:12:47] So it all depends on taste, on what you want to do.
[00:12:58] Okay, so now that we have this,
[00:13:00] we can also clone here this randomizer
[00:13:04] and we go maybe for a bit slower, six bars.
[00:13:11] And then we go here for the skewer.
[00:13:14] So now some of the voices get randomly
[00:13:20] morphed into a solid.
[00:13:23] (gentle music)
[00:13:25] That's also nice.
[00:13:46] So let's clone this randomizer here again
[00:13:49] and do it for the fold.
[00:13:50] (gentle music)
[00:13:53] Okay, so maybe we want to slightly detune each voice
[00:14:10] because it's very perfect on point.
[00:14:14] So we can maybe use the value again,
[00:14:17] detune everything a bit.
[00:14:19] (gentle music)
[00:14:22] Or we can do also another randomizer here.
[00:14:38] Just randomize each voice slightly.
[00:14:43] (gentle music)
[00:14:46] We can also try and push this down one octave.
[00:15:05] (gentle music)
[00:15:07] That's better.
[00:15:12] (gentle music)
[00:15:15] Okay, so this is one thing you can do.
[00:15:24] We can also do something like self resonance.
[00:15:29] We bring in here a delay.
[00:15:30] Take the output of this oscillator
[00:15:35] and bring it back into the input here for face modulation.
[00:15:41] (gentle music)
[00:15:45] And we do the same thing here with the randomizer.
[00:15:47] (gentle music)
[00:15:50] Give some interesting sounds sometimes.
[00:15:57] (gentle music)
[00:16:01] Not too much.
[00:16:02] (gentle music)
[00:16:06] (gentle music)
[00:16:09] So maybe we also want to use the chorus here, chorus plus
[00:16:27] just for extra movement.
[00:16:31] (gentle music)
[00:16:35] (gentle music)
[00:16:37] Maybe the output is a bit too high here.
[00:16:39] (gentle music)
[00:17:03] Yeah, and like I said, the best part is,
[00:17:05] you can now change the root key
[00:17:09] and you get a different sound.
[00:17:10] (gentle music)
[00:17:13] Okay, so I think I don't like here actually the switch.
[00:17:31] So maybe I just removed that.
[00:17:33] Let's move this here, remove that.
[00:17:39] And we go for three is maybe too much.
[00:17:44] (gentle music)
[00:17:46] That's okay.
[00:17:48] (gentle music)
[00:17:50] Yeah, two is okay.
[00:17:58] (gentle music)
[00:18:01] (gentle music)
[00:18:04] So now that we know the scale, which is EB minor,
[00:18:14] we can maybe place something on top.
[00:18:17] So I want to add here an EQ.
[00:18:19] For now, maybe filled out here the bass a bit.
[00:18:24] (gentle music)
[00:18:27] (gentle music)
[00:18:30] Yeah, we maybe could could use here
[00:18:34] my textures block in again.
[00:18:36] Textures.
[00:18:37] (gentle music)
[00:18:41] Oh, it's this one, yeah.
[00:18:44] Yeah, it's this one.
[00:18:48] (gentle music)
[00:18:50] Let's see.
[00:18:53] (gentle music)
[00:18:56] (gentle music)
[00:18:58] (gentle music)
[00:19:08] Maybe in front of the reverb.
[00:19:25] Yeah, it sounds a bit better.
[00:19:27] (gentle music)
[00:19:30] So now we can maybe use a sampler.
[00:19:41] And I can use my Triton Keywords patch.
[00:19:54] It's just a bunch of samples from the Triton Keyboard.
[00:19:57] A lot of different presets here as one sample.
[00:20:01] And we use a random modulator for that.
[00:20:06] And we select the random sample.
[00:20:09] Every time we press a key and then we hold it.
[00:20:12] Let's see how this sounds.
[00:20:15] (gentle music)
[00:20:17] Yeah, we got different key.
[00:20:19] (gentle music)
[00:20:23] And we want to have a slow attack here.
[00:20:25] Maybe we go for textures mode, longer grain.
[00:20:29] (gentle music)
[00:20:31] And we use the same reverb setting on that.
[00:20:41] (gentle music)
[00:20:43] (gentle music)
[00:20:46] Maybe a little longer.
[00:21:03] (gentle music)
[00:21:06] And then you play some random notes on top
[00:21:13] out of the key.
[00:21:14] (gentle music)
[00:21:17] I may be recorded.
[00:21:30] (gentle music)
[00:21:33] (gentle music)
[00:21:36] And because this randomized,
[00:22:02] you get a different sound every time here.
[00:22:05] (gentle music)
[00:22:07] And I mean, maybe use
[00:22:08] 50% chance on each note.
[00:22:14] So it's not played all the time.
[00:22:15] (gentle music)
[00:22:18] Maybe delay.
[00:22:19] (gentle music)
[00:22:22] (gentle music)
[00:22:24] Also very nice is here the delay plus, this one.
[00:22:38] And sometimes I like to
[00:22:41] randomize here the delay times.
[00:22:46] (gentle music)
[00:22:50] (gentle music)
[00:22:52] Ah, let's say every
[00:23:01] six half note.
[00:23:04] (gentle music)
[00:23:19] Let's put this here.
[00:23:20] (gentle music)
[00:23:22] So we have the
[00:23:23] (gentle music)
[00:23:26] Yeah, maybe in high pass, more high passing.
[00:23:29] (gentle music)
[00:23:31] EQ five on that.
[00:23:45] (gentle music)
[00:23:48] Bam, nice ambience.
[00:23:50] (gentle music)
[00:23:53] So all we need now is maybe a bass.
[00:23:58] (gentle music)
[00:24:00] So we can go for a polymer.
[00:24:02] (gentle music)
[00:24:04] Use maybe saw.
[00:24:05] (gentle music)
[00:24:07] Detuned.
[00:24:08] (gentle music)
[00:24:10] And we use your transpose.
[00:24:14] (gentle music)
[00:24:16] Go down to octaves.
[00:24:18] The tool device here.
[00:24:20] Make it mono.
[00:24:21] Use ADSR here.
[00:24:24] It's a bass so we can go monophonic.
[00:24:27] Let's see how this sounds.
[00:24:28] (gentle music)
[00:24:30] That's way too, way too high.
[00:24:32] (gentle music)
[00:24:34] (gentle music)
[00:24:37] And then you play a bass line.
[00:24:57] I don't know what.
[00:24:59] (gentle music)
[00:25:03] Or maybe stop at the root.
[00:25:05] (gentle music)
[00:25:32] Yeah, then you maybe use another reverb.
[00:25:35] At the end, maybe not too much.
[00:25:40] (gentle music)
[00:26:01] Then you bring everything into balance.
[00:26:03] (gentle music)
[00:26:06] Yeah, you can get creative with what kind of sounds
[00:26:24] you put on top or where you put it right.
[00:26:26] You have a lot of options here in the drone generator.
[00:26:30] You can see it's very easy, very simple,
[00:26:33] but you can make it so complex if you want to.
[00:26:36] Just stacking here fifth and fourth
[00:26:40] and also using some random sounds on top.
[00:26:44] Some sample treat on keyboard presets than a bass.
[00:26:49] You know, it's very, very simple actually.
[00:26:53] And there are so many options you can push this
[00:26:57] into different directions, right?
[00:26:58] You can put the beat below that,
[00:27:01] use some drums or leave it as it is.
[00:27:05] Maybe exchange the sine oscillator here
[00:27:08] for a wave table oscillator.
[00:27:10] Use some wave tables in there.
[00:27:12] Get a different sound.
[00:27:13] Whatever you want to do, right?
[00:27:17] So yeah, I just want to give you a quick idea
[00:27:20] how to do this and how to approach this.
[00:27:23] I maybe put this whole project here on my dispenser
[00:27:28] or on my Github page so you can download this for free
[00:27:31] if you want to.
[00:27:32] But actually you can, you just saw it.
[00:27:34] It's not that much.
[00:27:35] But this is a great starting point for ambient songs.
[00:27:38] So if you want to create these kinds of sounds
[00:27:42] or videos here on YouTube and get 80K views (laughs)
[00:27:47] which you probably don't get.
[00:27:48] But yeah, that's how you do it, okay?
[00:27:53] I hope this helps in a way.
[00:27:55] Thanks for watching, leave a like.
[00:27:56] Let me know what you think.
[00:27:57] Maybe you need some more stuff like this.
[00:28:01] Anyway, let me know.
[00:28:03] Let me know in the comments, okay?
[00:28:04] Thanks for watching.
[00:28:05] See you next video and bye.
[00:28:06] (dramatic music)
[00:28:10] (dramatic music)
[00:28:13] I don't let this run for one hour.
[00:28:34] Bye.