Bitwig Grid Ambient Patching with Dorian Chord Drones
Tutorial | Jun 07, 2026
Build a Bitwig Grid ambient Dorian drone patch with slow chord progression, bass, shimmer diffusion, and random textures using compact sequencing workflows.
- You can watch the Video on Youtube
- Support me on Patreon if you like what you hear.
- Download Presets, Tools and Projects on my Dispenser
Quick Answer #
- Patch type: Ambient/cinematic Bitwig Grid generative drone-pad in E♭ Dorian, built around a very slow 4-chord progression rather than a static single-note drone.
- Main sound-design direction: A single-oscillator arpeggiated minor chord shape is blurred into lush harmony with long reverb/diffusion, plus a root+fifth drone, slowly swelling bass, watery/noise textures, and sparse random melodic accents for a sci-fi feel.
- Important devices/modules: Poly Grid in monophonic mode, Merge as step sequencer, Counter, Trigger, Transport, Scale, Transpose, Pitch In, Stereo Merge/Split, Saw/Sine/Wavetable oscillators, low-pass/high-pass filters, Multiply, Mirror, Chance, Dice, AD/AR envelopes, delay/all-pass diffusion chains, Chorus, Peak Limiter, and end-stage MM Matcher / SC Dark processing.
- Practical result: A large, evolving preset that sounds harmonically rich while staying patch-efficient, with chord changes every 8 bars, bass fades tied to transport phase, randomized detail layers, and a final polished ambient texture ready to record or download as a preset.
Build Overview #
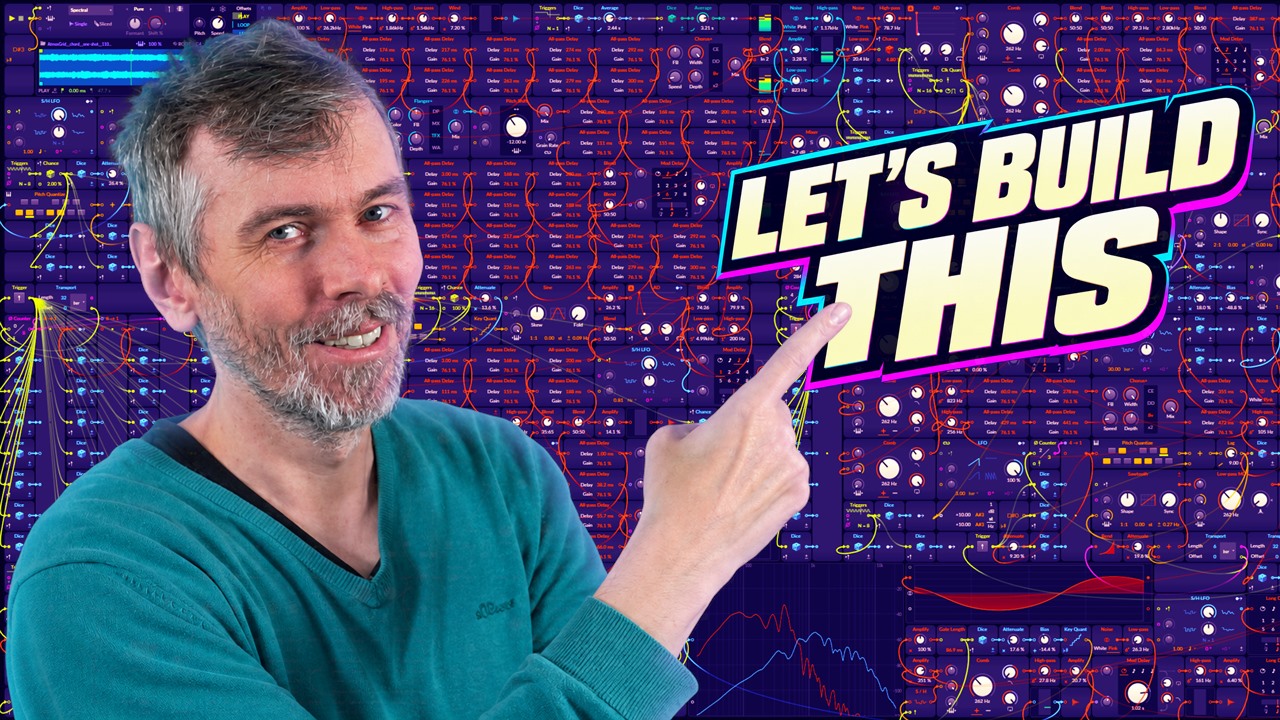
The session begins with a simple ambient concept: build a monophonic Grid patch in E♭ Dorian and let harmony emerge from sequencing rather than stacked polyphonic chords. A four-step note pattern acts as a broken minor chord, while a second slower sequence transposes that pattern every several bars to create a restrained chord progression. Reverb, delay, and diffusion are used to blur the arpeggiated motion into sustained harmony, while a separate drone layer reinforces the root and fifth. This keeps the structure compact inside the Grid while still producing the impression of wide, evolving pads.
From there, the patch expands into a layered generative texture. A bass voice follows the slow chord roots and is shaped with long amplitude and filter movement so each note fades in and out across the harmonic cycle. Additional shimmer, chorus, all-pass diffusion, sampled keyboard fragments, wavetable tones, filtered noise, and random melodic events are added to fill the spectrum and create motion without breaking the calm atmosphere. Much of the development comes from reusing timing signals, phase ramps, quantization, chance operations, and stereo utilities to derive multiple behaviors from a small set of control sources.
The value of the process for learning modular patching is that it shows how a complex result can grow from a few reusable ideas: one sequenced pitch source, one slow harmonic controller, and a handful of modulation signals distributed across many destinations. It also demonstrates practical modular thinking: conserving space by implying chords instead of fully voicing them, using scale quantization to keep transposition musical, and shaping form with modulation rather than manual automation. The result is less about a fixed recipe and more about understanding how timing, harmony, texture, and signal flow can be organized into a coherent self-playing system.
Patch Decisions #
- Set the Grid patch to monophonic and started with a peak limiter on the output as protection before building the rest of the signal flow.
- Built the “chord” as a 4-step note sequence feeding one oscillator in arp-like fashion instead of stacking multiple oscillators: root, root -1 octave, +15 semitones, +7 semitones. This was a space-saving compromise, relying on reverb/diffusion to make it feel chordal.
- Put the note sequence through a Scale module set for D# Dorian, so when the chord is transposed the notes are corrected to the mode rather than simple chromatic planing.
- Created a separate 4-step chord-progression sequencer for transposition with values 0, +3, -5, -7, and advanced it using Transport-triggered timing: a trigger every 8 bars into a Counter (4 steps), with playback/reset tied to transport.
- Added a background drone using a saw oscillator playing the chord root plus the fifth by packing two pitch signals with Stereo Merge: left = root, right = root +7 semitones, then converted back toward mono with a stereo utility/width stage because the hard L/R split was too obvious.
- For bass, took the root from the chord-progression sequencer rather than the arp note sequence, so the bass follows each chord root only; then quantized/switched it to nearest and moved it into the desired octave before filtering.
- Used the 8-bar phase ramp from transport timing for bass dynamics: passed it through Mirror to turn the ramp into a triangle-like rise/fall envelope, then into Multiply to fade the bass in and out across each chord, and also reused that shape to modulate the bass filter opening.
- Built a large ambient smear with Chorus (8 voices, slow, wide) into a chain of 14 all-pass filters, then into another delay/diffusion stage and mixed it back in; the all-pass times were manually copied from calculated values as a practical but tedious workaround.
- Added extra top-layer material with random triggering: a sampler of Triton keyboard sounds selected by Dice/random values, plus other noise/wavetable elements gated by Chance, filtered with high-pass/low-pass, and given small pitch wobble so repeated events felt less static.
- Mixed the main layers into a mixer with separate branches (pad/drone layers and bass), left some intermediate amps in place for visibility/control, then planned the final tone with MM Matcher and an SC Dark / Master Balanced-style dynamics stage rather than fine-mixing every internal level.
Interesting Moments #
- 00:01:10 - Arp-style minor chord built from one oscillator
- 00:05:55 - Slow 4-chord Dorian progression sequenced every 8 bars
- 00:09:06 - Root-plus-fifth drone made with stereo merge trick
- 00:29:21 - Bass tied to chord roots with 8-bar fade in/out motion
- 00:37:41 - Huge shimmer/reverb blob built from chained all-pass delays
- 00:45:22 - Random Triton sampler layer added for melodic texture
- 01:20:29 - Melody quantized to selected scale tones and transposed
- 01:46:27 - Final polish with MM Matcher and master balancing
What This Build Is Useful For #
This Bitwig Grid build is useful as a template for generative ambient, drone, soundtrack, and experimental electronic work. It shows how to turn a simple modal idea into a full evolving patch with slow chord motion, root-note drones, shaped bass movement, randomized melodic events, and layered diffusion.
It benefits Grid users who want to study patch architecture rather than just copy a finished preset: ambient producers, modular-style sound designers, film/game composers, and intermediate patch builders learning how to organize larger self-playing systems.
Reusable techniques include arpeggiated “fake chords” into reverb, scale-quantized transposition for modal harmony, long transport-based chord sequencing, stereo merge/split tricks for compact pitch stacking, envelope shaping from phase signals, random event generation, and building dense texture with all-pass, chorus, delay, filtering, and post-FX matching.
This long-form process is more useful than a short tutorial when the goal is understanding decisions, troubleshooting, iteration, and layout strategy inside a large patch.
Transcript #
This is the transcript of the video. The text was generated automatically and may contain small mistakes. The timestamps jump to the matching part of the video.
Click to expand transcript
[00:00:00] So the last video was pretty good, so let's just repeat it and do another grid.
[00:00:06] So this time I think I'm going not for major, I'm going for Dorian for some reason, maybe also EB Dorian.
[00:00:16] So I'm choosing this here, I don't need audio track and I use a poorly grid again.
[00:00:26] Again, very important that it's in monophonic mode, so it's just one voice playing, right?
[00:00:33] We don't need to activate the voices with the keyboard or anything.
[00:00:36] So that's the important point having this here on monophonic.
[00:00:40] So I probably start by using a peak limiter just in case, putting this down to dB.
[00:00:50] I'm starting by playing some kind of, so this time I want to use a chord progression that this was my idea a few minutes ago.
[00:01:00] I thought maybe instead of just using a drone that's playing all the time, why not use a very slowly progressing chord progression.
[00:01:10] So we can do this by using pitches, this module here.
[00:01:16] But I usually, my favorite is more like to go with the merge and create a step sequencer here, maybe four steps, something like this.
[00:01:30] And we do, what do I do? Maybe a root. So we get here the D sharp right from here.
[00:01:42] And then we say, we need to transpose.
[00:01:48] So we use the root note here as a sequence.
[00:01:52] Instead of playing a chord where I play multiple notes at once, that's usually what you do inside of the sequencer.
[00:02:02] The problem with this is that I need to have multiple oscillators for each voice here inside of the grid.
[00:02:08] And it clogs up a lot of space.
[00:02:10] I mean, we could do this, but I prefer actually lately just to use one oscillator and then playing this oscillator like an arp on arpeggiator.
[00:02:21] And then into a reverb and the reverb then diffuses the signal makes it longer.
[00:02:27] And it sounds like you are actually playing multiple notes at once, but it's not really the case.
[00:02:33] So this is the idea.
[00:02:36] So we go here for, let's say the root, then we have maybe the root, but one octave lower.
[00:02:45] So I just use that here, maybe minus one.
[00:02:50] Then we have, let's say, three up, which is a third of from the roots.
[00:03:01] It's a third up, a minor, minor third up.
[00:03:05] But instead of this, we go one octifier, which is usually just 15, but it's also a three plus one octave.
[00:03:17] Then we have here maybe seven up, which is just the fifth, right?
[00:03:25] So very basic.
[00:03:27] It's actually just a normal minor chord.
[00:03:30] The only difference is here we have done kind of an inversion where we have the third just one octave higher than usual.
[00:03:40] And here there's one root again.
[00:03:42] So root two times the root, one is one octave lower.
[00:03:45] So it's a basic minor chord actually, not very sophisticated.
[00:03:49] Go here into the pitch in.
[00:03:53] We don't need that because we don't want to play it on the keyboard.
[00:03:57] And we use here a scale, scale module.
[00:04:02] Where is it there?
[00:04:04] Because we want to later on pitch this up or down.
[00:04:08] And because we just plain what's the name planning or yeah, we just transposing the whole chord up or down.
[00:04:18] But on some roots, some of the notes need to change because we are in Dorian, D sharp Dorian.
[00:04:25] So we use here the scale.
[00:04:30] Let me use an amplifier here.
[00:04:37] Okay, and then we go through the sequence.
[00:04:40] First we just use what's the name trigger and the counter.
[00:04:48] We probably change this later on nearest.
[00:04:54] And then we use here four because we have four inputs.
[00:04:57] So every quarter note we skip to the next note, maybe every 16 notes or something like this.
[00:05:03] Let's see how this sounds.
[00:05:08] Right.
[00:05:09] And then we want to do a chord progression, which means we need to step here with the transpose up or down.
[00:05:20] Maybe go plus three.
[00:05:23] Then minus five.
[00:05:27] And minus seven.
[00:05:30] Then back to zero.
[00:05:33] This is the chord progression.
[00:05:34] Actually, this is the idea for the chord progression.
[00:05:36] Very simple.
[00:05:38] Nothing special.
[00:05:40] And the only thing that's special is we are not playing in minor.
[00:05:43] We are playing in Dorian.
[00:05:44] Dorian is kind of the same thing as minor.
[00:05:47] There's just one note is different.
[00:05:50] And this gives this kind of sci-fi feeling.
[00:05:55] So what we need to do now is we need to use a sequencer here to actually play the chord progression.
[00:06:01] We have already here a sequencer that plays the chord itself.
[00:06:06] So how do we do this?
[00:06:11] Maybe we just do the same thing.
[00:06:13] Merge.
[00:06:15] Go in here, out there.
[00:06:18] And the chord progression has also four notes.
[00:06:21] Use the transpose.
[00:06:25] So we go plus three.
[00:06:27] So a minor third higher.
[00:06:31] Then we go down to the fifth, but lower.
[00:06:37] So minus five instead of plus seven.
[00:06:40] And then we have here minus seven, which is actually plus five.
[00:06:45] Just one octave lower.
[00:06:47] So feel like that.
[00:06:49] Then we go into the transpose here.
[00:06:52] And then we change here this chord progression very slowly.
[00:06:56] So it's not like we make a fast chord progression.
[00:06:59] We want to even give the impression that there's no chord progression at all.
[00:07:07] We play each chord very long for a very long time.
[00:07:13] So this is this idea.
[00:07:15] So maybe we get a transport here.
[00:07:19] So with transport, it's nice because we can dial in your bar and can say
[00:07:24] every 16 bars we get here trigger, which is too long, but maybe eight bars.
[00:07:29] Every eight bars at 85 BPM, we get the trigger.
[00:07:35] And then we get the counter here.
[00:07:40] It's also four.
[00:07:42] Maybe we can reset it, maybe we use the playback here.
[00:07:45] So every time you press play on the transport, we reset the counter like this.
[00:07:54] Do we actually have here some kind of loop?
[00:07:56] Yeah, nice.
[00:08:00] This is the way.
[00:08:02] Let's see how this sounds.
[00:08:09] Let's play here. These are now four bars.
[00:08:14] Oh, it's actually looping.
[00:08:16] So we need also make this here at least eight bars long or 16 bars long.
[00:08:23] So when we reach this point here, it needs to switch to the next next chord.
[00:08:37] This long kind of works.
[00:08:54] Then it switches to the next chord progression.
[00:08:56] So this is pretty cool, but we also want to bring in maybe a saw here and the saw plays the root note.
[00:09:06] So this is the background drone, however you want to call it.
[00:09:21] So this plays the root and we want to play also, not only the root, we want to play the fifth on top, right?
[00:09:31] So seven semitones higher transpose seven.
[00:09:44] So because it's only one oscillator, we have to use two, which we can do, but we can also keep the patch small and use here this stereo merge where we can feed in left and right signals.
[00:10:00] So usually all of the signals in the grid, every kind of cable you can see here is a stereo cable, which means it passes left and right channel together in one line.
[00:10:15] But here with these stereo splits and stereo merge modules, we can actually combine different signals.
[00:10:21] So we can say on the left channel, we have the root and on the right channel, we have seven semitones up to transpose, right?
[00:10:29] Then we go into the pitch and it sounds like this.
[00:10:33] So now the oscillator on the right side is seven semitones higher and on the left, it's the root note, right?
[00:10:41] So we have left and right, which is a bit not pleasant.
[00:10:45] So what we do now is we use a stereo with this one here to make it mono.
[00:10:59] Something like that.
[00:11:01] And yeah, we have basically kind of an, what's the name drone?
[00:11:08] So then we use a low pass here, probably because we want to cut some of the frequencies away.
[00:11:18] Maybe I use it just to root.
[00:11:25] And we also want to play the stand in a reverb.
[00:11:28] So what I sometimes do is I use just my oldest or my recent grid patch here.
[00:11:40] This is what we built last time and just copy over some of the reverbs.
[00:11:48] Let me see.
[00:11:55] So this is the input here, this is the output.
[00:11:58] So we can just copy this over, disable that.
[00:12:03] So we go over here and we have here, let's say, let's keep the amplifier at the end.
[00:12:11] We go in there and then we have an output here.
[00:12:15] We bring this in there.
[00:12:17] So with this you have already.
[00:12:31] Maybe we also use your AD.
[00:12:35] You can use that.
[00:12:46] Every time we trigger this, we use a dice.
[00:12:52] And we randomize the skew.
[00:12:57] Or maybe we use a wave table this time.
[00:13:03] But when we use this wave table, we probably also need a filter because the saw produces too many overtones.
[00:13:15] But with the wave table oscillator, we can use your unison.
[00:13:35] And we can maybe try more delay before we go into the reverb.
[00:13:54] And a sample and hold.
[00:14:05] And we can use a chance module here.
[00:14:08] So it's not tricking all the time.
[00:14:25] That's not that good.
[00:14:42] Or maybe we only use the chance module or the stricter itself.
[00:14:59] Yeah, when we only use the wet signal, it's much better.
[00:15:14] Maybe here.
[00:15:36] Okay.
[00:15:44] You have already a nice sounding pad that plays a chord progression, a very slow chord progression.
[00:15:53] So now we can take the whole thing and use it again here.
[00:16:01] And do the same with this drone sound.
[00:16:10] Let's see how this sounds when we bring here this very, this displays just one note or two notes, the root and the fifth. And then we have this chord progression on top that basically gives friction.
[00:16:39] Maybe not that good.
[00:17:08] Maybe use a bandpass here and just modulate it slowly.
[00:17:14] Random.
[00:17:25] And then we use your chorus, of course.
[00:17:31] Or maybe after the modification.
[00:18:01] Maybe not too loud.
[00:18:06] Maybe try and use the different octaves. Let's see.
[00:18:23] Maybe it's lower.
[00:18:46] Okay, maybe use an SVF here again.
[00:19:11] It would be nice if I could change the volume.
[00:19:23] But I probably can.
[00:19:27] Let's use a stereo split here.
[00:19:42] There's some kind of stereo mixer here. I think I can remember something.
[00:20:11] It's not really doing what I want. Mix.
[00:20:18] A stereo merge or stereo split.
[00:20:21] Left channel goes in here, right channel goes in there.
[00:20:28] Now I can change the root and the fifth separately in loudness.
[00:20:58] That's maybe too much.
[00:21:15] Maybe I bring it in the background.
[00:21:21] It's a bit too static.
[00:21:24] Maybe change the volume here also.
[00:21:32] What a one.
[00:21:37] This one.
[00:21:41] There's a bit of fluctuation there.
[00:22:02] Maybe we use bipolar and we go +1, so it goes to +1 and 0 and -1.
[00:22:27] And let's try another delay + here at the end with a bit of feedback.
[00:22:56] Okay, I think we need the bass for next spectrum.
[00:23:11] We have this here. Give this a different color and this one here.
[00:23:35] Now we need to mutilate this.
[00:23:53] We get more overtones.
[00:24:09] You can see the drone and the melody, or the chords on top share a bit of the same space, but I kind of want to have some kind of diffused mesh up there.
[00:24:25] There's maybe a bit of room here for nice bass.
[00:24:30] I guess the chords here can take some kind of high parts.
[00:25:00] Maybe a good idea later on is when I take all the two signals and put them together in another reverb and then do a bit of low pass.
[00:25:19] So they stay better together.
[00:25:34] You can also randomize this here, so instead of using here an inversion, I use sometimes not an inversion.
[00:25:50] But it's completely random.
[00:26:10] Okay, so let's go back to the bass.
[00:26:16] Use a saw as a bass probably.
[00:26:21] Use an amp.
[00:26:24] We use an out.
[00:26:30] We need here the root.
[00:26:33] This one.
[00:26:36] No, we don't need the root. We need a sequence here, the chord progression root.
[00:26:44] This one.
[00:26:57] Let me just copy this over.
[00:27:04] And we need the root here.
[00:27:14] So I can't use this one here.
[00:27:17] I can't use this one because here I play different chord notes into this transpose.
[00:27:24] So I get not only the root, I only want to have the root for each chord, which is what we do here.
[00:27:34] Oh, we need to also switch this here to the nearest.
[00:27:42] This gives us the root here, and then we can scale this down with an octave, but you can also just switch here and say we want to have the root note, but octave zero, whatever.
[00:27:59] See what this is on?
[00:28:01] Now we need a low pass.
[00:28:04] MG. We can also take the note in here.
[00:28:15] Okay, short break.
[00:28:19] Maybe it's too low.
[00:28:42] Yeah, maybe you can take the bass here. Bring it in here. It's a very static bass.
[00:28:51] So we need to change this, of course.
[00:28:55] We just detune left and right channel and do also here stereo with this one.
[00:29:21] Yeah, and then we have here the transport. The transport triggers the counter, and the counter switches then from chord to chord to every eight bars.
[00:29:35] So every bass plays exactly eight bars long, right? This is the sequence.
[00:29:41] So the bass plays for eight bars, and then it switches to the next root note because we changed the chord.
[00:29:47] So we can take here from this one the face signal, which means this purple line or this purple ramp is exactly eight bars long.
[00:30:04] So we can sequence here this with what's the name mirror. So instead of having one ramp going up over eight bars, we have a second signal here, which goes up over four bars and then goes down over four bars.
[00:30:29] So it's a triangle instead of just ramp right here. It goes up and then it goes down over four bars.
[00:30:38] So with this, we can sequence the loudness of the bass much, much better.
[00:30:43] So I just use here a multiply and then I use that change here.
[00:30:55] So the bass slowly fades in, fades out slowly and then changes note and then it fades back in slowly.
[00:31:09] And yeah, we can use the band make this a bit smoother.
[00:31:19] So it's faster, louder and then stays loud for longer and then falls off faster.
[00:31:33] We can also use that for opening up the filter.
[00:32:04] Oh, this is actually wrong. This is wrong. We need to use the trigger to trigger the counter.
[00:32:23] Too many overtones here.
[00:32:35] Okay, we have already a lot of stuff here.
[00:32:39] We maybe need to sort this pretty soon.
[00:33:09] So this is all green.
[00:33:21] It's like a glove.
[00:33:40] So this becomes purple and we have the bass here.
[00:34:10] Bass is red.
[00:34:18] This was the bass here. Maybe we can cut out the purple a bit more, maybe 500.
[00:34:41] So maybe here instead of plus three, this is...
[00:34:51] Maybe go here and octave lower.
[00:35:10] That's better.
[00:35:20] Okay, so now that we have this, we can maybe create another output.
[00:35:28] We bring this in into a mixer.
[00:35:32] So this is mix one, mix two and the bass.
[00:35:51] Something like that.
[00:36:11] You probably don't need here the amplifiers, but I leave them there because I like the setting so far.
[00:36:20] We can see what's going on there.
[00:36:28] So I want to use this later to add some more post FX there.
[00:36:37] And sometimes a bit better to have a better overview of what's going on with the sound.
[00:36:44] What I do next is I probably want to use my calculator here.
[00:36:54] So here's a shimmer. Nine steps, maybe I use twelve also. And is much higher. I need to correct this here.
[00:37:16] Yeah, this is not good.
[00:37:22] 300 maybe, 300 milliseconds.
[00:37:27] And I start with one millisecond and we use more.
[00:37:41] So we have a lot of values here we can use.
[00:37:47] So we need to use, what do we use? 14 R passes.
[00:37:56] Okay, so we go basically here in here, or maybe we start by using the chorus first.
[00:38:05] Using the chorus eight voices all the way up, slow modulation, very wide.
[00:38:15] Okay, so then we have one, two, three, four, five, six, seven, eight, nine, ten, eleven, twelve, thirteen, fourteen.
[00:38:27] So we have to line them up.
[00:38:38] One, two, three, four, five, six, seven. We go in that one.
[00:38:47] Probably better way to do this, but I'm an old man. Don't judge me.
[00:38:58] Okay, so then we have that, and then we can go into another delay, maybe.
[00:39:09] Slight diffusion, and then we mix this back in.
[00:39:16] All we need to do now is to copy all the values, which is a bit tedious.
[00:39:26] I have to start to copy this.
[00:39:28] By the way, I think if you copy this in here with float values, they are not shown.
[00:39:35] It's rounded, right? So it's rounded to 1559.
[00:39:39] But if you copy this in, I think they are still using the internal values here, what you copied.
[00:39:47] So it's not just gone.
[00:39:59] I wish there would be better way, but that's how it is.
[00:40:03] The grid is not really interesting for Bitwig or for the majority of people.
[00:40:10] They all want to have the interesting, popular features of Ableton Live.
[00:40:20] No one cares about the stuff here besides me, probably. Maybe five others.
[00:40:28] But that's how it is.
[00:40:33] I think the grid is the best modular synth ever, in my opinion, because it's so fine-grained.
[00:40:43] But even when it's so fine-grained, it's still usable, hands-on, and it's fun.
[00:40:50] It's like Legos.
[00:41:03] So now we have this big blob of sound here.
[00:41:10] And yes, the bass, of course, is stereo, but I don't care at the moment.
[00:41:17] It sounds good on my headphones.
[00:41:20] It's not made for the four-club system anyway.
[00:41:28] So maybe you can change the loudness a bit, because it becomes louder, because we're adding up here a motor ball.
[00:41:57] It's not really important how it's mixed at the moment, because we put probably an MM Matcher at the end anyway.
[00:42:08] So the MM Matcher then changes the frequency spectrum much, much better.
[00:42:16] So it sounds like more all my other music patches on YouTube.
[00:42:28] Let's try again and bring in more overtones here.
[00:42:59] We can also play around here with the chance.
[00:43:28] So we have the mixer here in the near range of the frequency spectrum, which is maybe useful a bit.
[00:43:40] And we have the post FX.
[00:43:50] Do we need this here? No, we don't need this. It's doubled.
[00:43:55] Also this one here. That's why it's so loud.
[00:44:15] Damn, it fits.
[00:44:33] Okay, very simple actually so far.
[00:45:04] Okay, so now we can play around with some sounds on top, because at the moment we only have drones or pad sounds, however you want to call it.
[00:45:17] So it would be maybe nice to have some individual sounds on top.
[00:45:22] So what I reuse all the time is a sampler patch. So there's a sampler here. And I have here some Triton keyboard sounds sampled.
[00:45:37] These are basically only presets from the Triton synthesizer and only the keyboard or the keys category, which is all the important sounds in my opinion.
[00:45:55] And then we can just trigger this randomly. I give you here a taste of how it sounds like.
[00:46:06] AD triggers. We use a dice. Dice gives us a random number. Then we use a scalar. So we are in the scale of the track. We don't need this.
[00:46:26] We probably want to attenuate the dice something like this.
[00:46:36] We have an output. Let's use an amplifier here.
[00:46:52] These are just random pitches, but we also want to have different samples, because I have all the samples in here.
[00:47:01] And these are spread out with a select knob. So when we change the select knob, we change the sample.
[00:47:14] I change the select knob every time we trigger this.
[00:47:24] Cool. And then we don't want to do this all the time. So we just pull down the chance.
[00:47:33] And then we probably also only want to use higher octaves. So we go at least one octave higher.
[00:47:47] And then we can just go into this mixer here. Let's mute all of this.
[00:48:02] Maybe the length.
[00:48:12] Maybe two octaves higher.
[00:48:23] Maybe also interesting when I open this up here and see all the samples. These are basically plug sounds.
[00:48:31] Having a pretty strong tech phase. So what I do is I start later in the sample.
[00:48:46] And then use textures mode.
[00:49:00] And bring this down to 2%.
[00:49:21] And I put the chorus there.
[00:49:31] And maybe you can also modulate slightly with an LFO.
[00:50:02] That's too much.
[00:50:16] And it needs to run free. So every time we restart or re-trigger this, right, the LFO jumps to a specific point, you get some artifacts here.
[00:50:30] Maybe we also need here some filtering slightly.
[00:50:39] Maybe use this here. Maybe use this here. And this is maybe random.
[00:50:51] The problem here with this input is you can't see actually how much you modulate. Here you can see it much better.
[00:51:10] We also don't need this.
[00:51:18] And we need the VU meter.
[00:51:23] So this using just samples is basically the fastest way to get more variety in your overtones.
[00:51:30] Just use some random samples.
[00:51:34] Of course I do it mostly the hard way by using oscillators and then create overtones in various ways, but this is just a challenge for me.
[00:51:51] Actually all of this is not needed. You don't need to do this. This is just fun for me. That's why I do it.
[00:51:58] Sometimes people ask me why do you do this and you don't need to do this and so on, but it's just fun. I just make it because it's fun.
[00:52:08] Oh I need a high pass here.
[00:52:28] [Music]
[00:52:40] That's too loud.
[00:52:51] So again another sound source. We don't need to have this here.
[00:53:10] This is fit.
[00:53:27] Do this yellow.
[00:53:40] Nice. How long? Oh we have already one hour. Damn. I need to hurry up.
[00:53:50] So this is way too often so 50%.
[00:53:57] Maybe I saved this already. Generative.
[00:54:04] What's the date today? 7th.
[00:54:20] Sleep well.
[00:54:42] Try and make some kind of Vangelis type of stuff so I use a pause.
[00:54:52] We do basically the same thing here as we did here.
[00:55:01] Trigger dice. The dice gets random. We get this.
[00:55:16] Then we need to modulate that.
[00:55:26] Probably it's why do I use an internal module when I could just use that but sometimes I just like to use these modules. There's no big reason.
[00:55:43] And I have the modulator source directly besides what I'm modulating. That's also nice to have.
[00:55:53] Okay now.
[00:56:06] Trigger. We use a separate trigger here.
[00:56:12] Let's use the chance.
[00:56:20] And we want to use another separate.
[00:56:48] So we have here that. We can use a leg so it's a bit more glidey. The melody at least.
[00:57:17] Hey hey hey.
[00:57:46] I think we can just remove that.
[00:58:15] And I probably want to have a separate reverb for that.
[00:58:26] So maybe pull this down and then take it out here.
[00:58:57] Are you too high?
[00:59:26] Okay.
[00:59:53] Dying this in is always a pain in the ass because either it sounds like an echo or it's too metallic.
[01:00:20] So this is why I did this calculator.
[01:00:50] So this is way too often of course. So I go down to 10%.
[01:01:17] Or even lower. 5%. Because sometimes I let these patches play for one hour and if you have one sound coming over and over it's a bit annoying.
[01:01:37] So you need to spread it out.
[01:01:56] Okay let's put this together.
[01:02:18] Okay let's use another alpase.
[01:02:27] Bam.
[01:02:47] Okay so then we can put this maybe over here.
[01:03:12] So we can fill up the space in here a bit with some noise stuff.
[01:03:42] Okay.
[01:04:11] Okay.
[01:04:41] And a bit of high pass.
[01:05:11] I think this needs a bit of pitch wobbly here.
[01:05:32] Not too much. Just a tad.
[01:06:02] Let's use a high pass here.
[01:06:31] Okay.
[01:06:52] I can fill the space with a view meter.
[01:07:22] Okay.
[01:07:37] Noise. Noise.
[01:07:48] Hmm.
[01:08:10] Okay. I'm ready.
[01:08:14] Low pass.
[01:08:18] And maybe a chance module. Noise directly into chance.
[01:08:24] Let's see how this works out.
[01:08:54] Maybe it was a selling key.
[01:09:24] Let's see how this works out.
[01:09:34] Let's see how this works out.
[01:10:03] Okay.
[01:10:32] Sounds almost like a small of the stream.
[01:11:02] Okay. Maybe another one.
[01:11:31] Let's see how this works out.
[01:11:51] Let's see how this works out.
[01:12:20] Let's see how this works out.
[01:12:36] Now we need to randomize this.
[01:13:06] Let's see how this works out.
[01:13:35] It sounds very watery.
[01:13:50] So maybe I mix this together.
[01:14:20] Actually this is not needed.
[01:14:47] Bam.
[01:15:17] Maybe we can amplify the base a bit more or a bit better.
[01:15:33] Maybe this is a bit too loud.
[01:15:55] Not too loud because it's a bit annoying over time. Let's be honest.
[01:16:07] Maybe we can take some more modulators here to change the volume over time.
[01:16:36] Okay. Let's do some random things.
[01:17:05] So we're in the melody lines.
[01:17:35] Trigger.
[01:17:44] It's only three steps.
[01:18:09] And we do a gate or select.
[01:18:20] Delay.
[01:18:25] We do an art here.
[01:18:29] Amplifier.
[01:18:40] And then we do a random switch.
[01:19:00] Every, I don't know, four bars, maybe eight bars.
[01:19:11] Maybe we should get the trigger here.
[01:19:39] Oh, we need to.
[01:20:08] So every note of the scale is something, not my thing.
[01:20:29] So we need to take a quantizer.
[01:20:35] Only take the root, 1, 2, 3, 4, 5, 6, 7, 8, 9, 10.
[01:20:48] So the root, the fourth, fifth, and the eleventh.
[01:20:57] And then we need to transpose it.
[01:21:11] And then we go into a scalar. Okay, that's probably better.
[01:21:40] Yeah, we need the reverb, at least.
[01:22:10] So we're going to do a random switch.
[01:22:39] Okay, so this one sign is a bit boring.
[01:23:08] We take this for modulation.
[01:23:27] Maybe use a wave table here.
[01:23:30] I have random wave tables here. I created this with zero at some point.
[01:23:38] They are pretty random, completely chaotic.
[01:23:47] I have completely randomized tables in there to use this position.
[01:24:15] But they have no real, what's the name, root?
[01:24:20] They have no fundamental.
[01:24:22] So you can use a sub oscillator here with the same pitch.
[01:24:29] And then we can use here a sign.
[01:24:59] And this pitch is also a bit too static.
[01:25:18] So maybe it was just timing it again. Bipolar. Then we modulate this just lightly.
[01:25:48] And of course we don't need to have this every time, so 5%.
[01:26:17] Okay, so we're going to do a random switch.
[01:26:37] Cool, so far. I really like it, but I have not that many things right there.
[01:27:06] What a sort of problem.
[01:27:36] We can do some random sounds here.
[01:27:53] There's a sign.
[01:28:23] We need random numbers for that.
[01:28:52] Thanks for that.
[01:29:20] Okay, we got random nice sounds there.
[01:29:49] Put the select there.
[01:30:09] We switch this on and off randomly then.
[01:30:26] Nice. Get random numbers.
[01:30:56] Okay, so we're going to do a random switch.
[01:31:25] And we need the high pass.
[01:31:36] And we don't want to have this all the time.
[01:32:06] Maybe use a chance instead of this.
[01:32:36] Okay.
[01:33:07] Yeah, we modulate this also. But heavily.
[01:33:34] Okay, so we're going to do a random switch.
[01:33:53] So here we need to add a static delay or static reverb.
[01:34:22] Okay, so we need to add a static delay or static reverb.
[01:34:51] Okay.
[01:35:18] Okay, so we're going to add a static delay or static reverb.
[01:35:46] Okay, so we're going to add a static delay or static reverb.
[01:36:12] Maybe too fast.
[01:36:42] Okay, so we're going to add a static delay or static reverb.
[01:37:11] Okay, so we're going to add a static delay or static reverb.
[01:37:39] Okay, so we're going to add a static delay or static reverb.
[01:38:03] I actually kind of like it how it sounds already.
[01:38:15] How do I make it fit on the screen? Maybe I put this over here.
[01:38:45] Okay, so we're going to add a static delay or static reverb.
[01:39:12] It would be nice to have some kind of auto-assort, auto-arrange.
[01:39:42] Does it fit on the screen later? Let's zoom in.
[01:40:07] Okay, so we're going to add a static delay or static reverb.
[01:40:37] Okay, so we're going to add a static delay or static reverb.
[01:41:04] Okay, so we're going to add a static delay or static reverb.
[01:41:34] Okay, so we're going to add a static delay or static reverb.
[01:42:01] Okay, so we're going to add a static delay or static reverb.
[01:42:30] Okay, so we're going to add a static delay or static reverb.
[01:42:58] Okay, so we're going to add a static delay or static reverb.
[01:43:29] Okay, so I think we need to fill out this space here a bit more.
[01:43:36] Then we have it.
[01:43:40] I mean, there's some stuff here on the side.
[01:43:44] Maybe we need to show.
[01:43:47] I wish Bitwig implemented some kind of liquid zoom.
[01:43:52] So at the moment we have only two this and this, but there's nothing in between.
[01:43:59] It's really hard to come up with patches that completely fill the screen.
[01:44:06] It's a challenge in itself.
[01:44:15] But you can see mostly all of the stuff just the stuff here is dropped.
[01:44:29] Put maybe here some kind of oscilloscope there.
[01:44:46] Something like this.
[01:44:55] Here we have a bit of room.
[01:45:11] Oops.
[01:45:16] Yeah, that's better.
[01:45:22] You can maybe add more alphas here.
[01:45:35] Like that.
[01:45:42] And this goes there.
[01:45:58] Actually, putting this on screen is a challenge in itself.
[01:46:05] What it kind of works looks neat.
[01:46:08] It's complex and interesting.
[01:46:11] Everywhere happens something and it makes sense.
[01:46:13] It's not like it's only show.
[01:46:15] It's really doing something.
[01:46:27] Yeah, and we need to use an MM Matcher here.
[01:46:35] I match this against my preset here, what I use for all of the patches I do.
[01:46:51] Maybe I use an SC Dark in front.
[01:46:58] Master Balanced.
[01:47:01] Then I have very long attack, very long release.
[01:47:27] Let's analyze this here for a moment.
[01:47:38] Put this there.
[01:47:49] This is basically what I filmed then or what I record for maybe one hour.
[01:47:59] And that's what you see on the video.
[01:48:13] It doesn't matter how big the interface is here, you can always only have two steps here.
[01:48:23] It would be so nice to have a liquid zoom.
[01:48:29] Let's see what's happening here.
[01:48:49] So now I have to find a noise here.
[01:49:03] And you can almost hear the chord progression.
[01:49:06] There's a chord progression in there.
[01:49:08] But because we have on top this kind of drone sound that only plays...
[01:49:15] This is a bit loud.
[01:49:19] There's a random noise thing here.
[01:49:29] Maybe I filled the space here.
[01:49:50] Yeah, perfect.
[01:50:02] So this is what I filmed.
[01:50:06] And then I upload the preset and you can download the preset.
[01:50:10] That's it.
[01:50:11] Thanks for watching.
[01:50:12] Let me know if you need to understand something better.
[01:50:15] Maybe if you have some ideas for what I can do next in the next patch, what you want to see.
[01:50:25] And maybe I'll do it.
[01:50:27] Thanks for watching.