Bitwig Poly Grid Percussion Generator: Fast Random Drum Design
Tutorial | Mär 26, 2026
Learn how to build a random percussion generator in Bitwig Studio using Poly Grid, dice modules, envelopes, noise, and simple modulation techniques.
- You can watch the Video on Youtube
- Support me on Patreon if you like what you hear.
- Download Presets, Tools and Projects on my Dispenser
Quick Summary #
Bitwig Studio’s Poly Grid offers a powerful environment for building generative percussion instruments from scratch. By combining oscillators, random modulators like the Dice module, and clever signal routing, it’s possible to create an endlessly variable percussion generator without relying on pre-selected drum samples. This approach empowers music producers to rapidly explore unique percussive textures, saving time and encouraging creativity in sound design workflows. Fine-tuning the range of randomization, pitch targeting, and spectral processing opens up detailed control, yielding everything from tight kicks to shimmering hi-hats, all dynamically synthesized within Bitwig’s modular grid.
Key Takeaways #
- Use Poly Grid in Bitwig Studio to create a modular percussion generator with high flexibility.
- Randomize oscillator pitch by triggering a Dice module and feeding its output to the pitch input, allowing for instant random pitch generation per note.
- Implement range (attenuate) and bias (offset) controls to constrain and shift the pitch randomization, making it suitable for different percussion types (e.g., low for kicks, high for hi-hats).
- Layer multiple sine oscillators and use FM or PM modulation, each with its own random pitch and modulation amount, to create more complex harmonic percussion timbres.
- Apply independent randomization to envelope decay stages, noise amount, filter resonance, and panning to achieve varied, organic percussive results.
- Mix body and noise layers with cross-modulation for clear transient shaping, and use peak limiters, distortion, EQ, and additional filtering in the post-fx chain for further sound sculpting.
- Leverage macro controls (buttons/knobs) for key parameters like generate, decay, mix, and drive, making sound design and variation easy from both the Poly Grid and Drum Machine device.
- Be aware of Bitwig’s limitation: random values generated via Dice do not persist after project reloads. Sampling or recording output is needed to make sounds permanent.
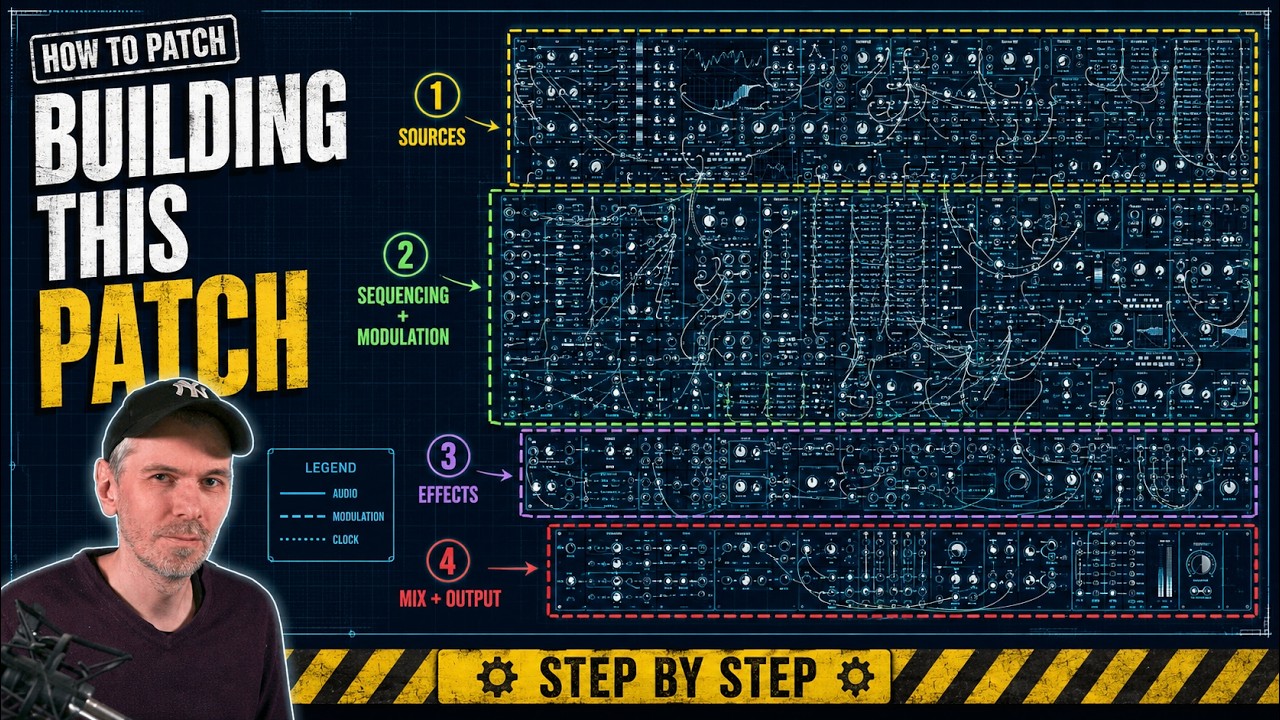
Generative Percussion with Bitwig Studio’s Poly Grid #
Creating dynamic and playable percussion in Bitwig Studio doesn’t have to involve tedious sample selection or manual drum programming. With the Poly Grid device, it’s possible to design a versatile, completely randomized percussion generator. Here’s a breakdown of the technique and workflow to achieve fast, unique electronic percussion sounds from scratch.
What It Does #
This percussion generator creates a wide variety of drum and percussion timbres without the need for pre-collected samples. By leveraging random modulation sources (such as the Dice module), amplitude envelopes, FM/PM synthesis, and strategic filtering, it produces unexpected, musical drum sounds each time it is triggered. Parameter ranges such as pitch, overtone complexity, decay, and noise coloration are all randomized, offering endlessly new hits suitable for drum machine integration.
How It Works #
Signal Path Overview #
- Oscillators: Multiple sine oscillators serve as the base for both body and overtones.
- FM/PM Modulation: Oscillators are frequency- or phase-modulated (FM/PM) by each other to create spectral variation typical of metallic and struck percussive sounds.
- Noise Generation: White noise, shaped by envelopes and filtered with resonant band-pass and peak filters, adds the attack and texture elements.
- Randomization: Numerous Dice modules generate random values controlling oscillator pitch, FM amount, decay time, filter cutoff, resonance, and more.
- Envelope Shaping: AD (attack-decay) envelopes give each element snappy, percussive shapes, with ranges or durations randomized for every hit.
- Amplitude & Routing: Levels, attenuation, and body/noise mixing are tunable both globally and per-randomization, creating balance between tonal and noisy elements.
Key Modules and Features #
- Dice: Generates a new random value (between -1 and 1, or 0 and 1 in unipolar mode) when triggered, controlling pitch, FM/PM depth, filter frequencies, envelope lengths, and more.
- Attenuate/Bias: Adjusts the span and offset of each random parameter. "Range" affects how wide a modulation sweep occurs, while "Bias" shifts its center point (e.g., moving average pitch lower for kicks, higher for hats).
- Peak Limiter and Oscilloscope: Ensures output does not clip and allows visual monitoring of created waveforms and random ranges.
- Envelope Modulators: Control precisely when each layer or modulator is active, for example, ducking noise during the initial body transient.
Workflow #
Basic Patch Construction #
- Start with an AD Envelope for quick, percussive amplitude shaping.
- Insert Sine Oscillator(s) for the tonal body.
- Disconnect Pitch Tracking if constant pitch across MIDI keys is desired.
- Add Dice module(s), gated by triggers or MIDI key input, to create random tuning and modulation amounts.
- Add Attenuate and Bias, so that pitch, FM amounts, and other randomizations stay within musically useful ranges (with “type” controlling pitch center).
- Duplicate Oscillators and configure FM or PM. Use separate Dice modules for each modulator’s random depth and frequency.
- Use Additional Dice for Envelope Decays, so every hit has a slightly different length and articulation.
- Add a Noise Source with its own envelope, filter, and randomization. Band-pass or peak filtering ensures the noise sits in the desired frequency range (snare-like, hi-hat-like, etc.).
- Mix, Distort, and Output, with parallel wet/dry controls for clean balancing.
Integration in Drum Machine #
- Place the Poly Grid patch in a drum machine pad.
- Use a remote button to trigger a new randomization for each cell.
- Duplicate across multiple cells for a randomized kit, then sequence as normal.
- Adjust key macro parameters (decay, blend, distortion, etc.) for each pad to taste.
Randomized EQ and Post-FX #
Further variety can be introduced by:
- Placing parametric EQ with random Dice-driven swept-band frequencies, gains, and Qs.
- Adding creative post-effects like phasers controlled by incoming random or modulated signals.
- Finalizing with safety limiting, low/high-pass filtering, and optional saturation.
Practical Uses #
- Idea Generation: Quickly create new percussion sounds without searching through vast sample banks.
- Layering: Use as a percussive layer under a more fixed drum sample for greater complexity.
- Electronic and Experimental Genres: Suitable for glitch, IDM, techno, and other styles requiring unique percussive elements.
- Sound Design Exploration: A platform for learning synthesis and random modulation interaction.
Limits and Considerations #
- Parameter Tuning: Because so much is randomized, the best results require manual narrowing of ranges, grouping of randomization, and listening for “sweet spots.”
- Repeatability: By default, newly generated sounds will change each time the project reloads or is bounced offline; Bitwig currently does not persist random values after closing and reopening.
- Sampling: To preserve interesting results, record output to a new audio track and save as a sampled hit.
- Preset Management: Saving the generator or a full drum machine as a preset enables quick recall, though randomness at initialization remains an issue until persistent random state functionality is added to Bitwig.
This approach offers a flexible, creative workflow for generating unique percussion with minimal effort and maximum sonic variety. Downloading and modifying the provided preset or building from scratch can lead to a highly personalized palette of electronic percussion sounds.
Transcript #
This is the transcript of the video. The text was generated automatically and may contain small mistakes. The timestamps jump to the matching part of the video.
Click to expand transcript
[00:00:00] So today I want to show you how to create a nice percussion generator in Bitwig Studio.
[00:00:04] Pretty easy, pretty simple, because sometimes I open up your Bitwig and I want to load the drum
[00:00:10] machine. And I'm too lazy to actually select a bunch of samples. So I go for generator. So
[00:00:19] we do this here by using a polygrid. And we have here an oscillator, we have an amplitude envelope
[00:00:26] and output. And you want to exchange this for maybe this type of envelope, because we only want
[00:00:32] to have attack and decay. Sine oscillator and the sine oscillator we can disable, hit the pitch
[00:00:37] input, the pre chord, because we want to use the keyboard. And we don't want to change the pitch
[00:00:43] when we change the key on the keyboard, of course. Okay, so what we want to do is we want to generate
[00:00:48] random values with the dice module here, and maybe trigger module like this. So every time we press
[00:00:56] the trigger, we generate a new number between zero and one. And we want to drive here the sine
[00:01:02] oscillator pitch input with this all the way up. And we also want to enable here the bipolar
[00:01:08] icon. So we generate numbers between minus one and plus one. I hope this makes sense. So now every
[00:01:16] time we press this button, we generate a new value, the new value then is interpreted as a pitch.
[00:01:23] And we get the random pitch out of it. It's pretty random. We also want to have your peak limiter.
[00:01:33] So no one gets mad. Anyway, so let's use here an oscilloscope, and we can see the random number
[00:01:41] here is between minus one and plus one. Every time I press this button here, we get
[00:01:46] a lot of different pitches. So we can control this a little bit with an attenuate.
[00:01:53] Just pull this down, let's say here, and then when you generate, it's only between minus and plus
[00:02:00] zero or two, right? So it's a smaller range. So we can call this range.
[00:02:06] I can control this with that. So now every time we press this, we have a pitch around C3.
[00:02:18] Now we can also use a gate input here. Every time we press the key on the keyboard, we create a gate
[00:02:25] and then we trigger the trigger to trigger the dice. We get a random value in a specific range.
[00:02:29] We get the random pitch out of the sinus slider.
[00:02:31] Nice. So yeah, with the range, we can control the range, of course, and we can also use
[00:02:43] what's the name, bias. So this is the bias, or we can call it offset or maybe type.
[00:02:51] Because with type, we can influence where this middle line is. At the moment, it's C3,
[00:03:00] but when we want more like generate kick drums or bass sounds, of course, this type needs to go down.
[00:03:06] So now the randomization happens more like in the lower end, the lower spectrum. We go up,
[00:03:14] randomization happens more like in the upper pitches. So it's more like for snare sounds or hi-hat
[00:03:18] sounds. Okay, cool. So yeah, that's that's the whole idea. And instead of just using a sinus
[00:03:30] slider, we could use maybe a wavetable. But with the wavetable, we only have a selection of waveforms
[00:03:36] here. It's also just linear. So we go from one waveform to the other waveform. It's a very old
[00:03:44] technique of using different waveforms, wavetable. So yeah, we don't want to use that as we go back
[00:03:52] to science. What we want to do instead is we want to duplicate the sinus slider. We go for
[00:03:56] FM or here PM. So we can, yeah, modulate the first oscillator with audio rate, and we get
[00:04:07] nice overtones, random overtones. What we also want to do is we want to use a different bunch
[00:04:13] of modules here for the dies. We have a different random value here for this oscillator. And you
[00:04:22] can also change the range in the type. Again, we can control how it sounds. So this is more for
[00:04:30] controlling what's coming out of the random noise generator. We can completely remove this here.
[00:04:37] And it's very random. So now you get more like type of kick drum sound. Sometimes you get the metallic
[00:04:43] sound. Sometimes you get more like a percussion sound out of it. So it's very random. So let's
[00:04:48] try this for a moment. Let's go for 100. So it's all over the place. Let's bring this back.
[00:05:04] 100%. We can more like control what's happening here.
[00:05:10] Okay, then we maybe add another one like this.
[00:05:19] Also again, 100% here. And here we want to have more like low frequencies. So it's
[00:05:27] more like an LFO that modulates everything that's below it. That's how I imagine it.
[00:05:35] So it's more like an LFO or like an envelope, a random envelope.
[00:05:39] But here it's PM, which is okay. You can do this. But a better sound sometimes is to use here an
[00:05:56] add for the pitch itself. And then use this here. So this is more like exponential FM,
[00:06:07] which gives you more random percussion sounds.
[00:06:23] Okay, so the problem here is that we modulate all the time to the full extent. So we can duplicate
[00:06:33] here the attack, not the attack, the envelope for that. Put this in there. And also maybe here.
[00:06:44] So we have now control over when these LFO, when these oscillators modulate the oscillator below
[00:06:52] in what kind of envelope. So this is more like percussions, right? So we can define here, oh,
[00:07:00] we want to have only this modulation in the first part of the sound in the attack phase.
[00:07:16] So why not randomize this also, right? So we duplicate here the dice. Use a modulator out.
[00:07:23] And we want to disable the bipolar option because we want to only modulate upwards, right? We want
[00:07:30] to modulate into the longer phase. We don't want to make it shorter. So this way we can define what's
[00:07:36] the shortest amount of the decay. And then every randomization happens upwards. So it makes it longer,
[00:07:43] but not shorter. So this is why we disable here the bipolar option.
[00:07:47] And the same thing we want to do here for this decay.
[00:08:10] Maybe you can do this also here for the, no, I think it's better to leave it manually so we can
[00:08:17] decide how long the percussion sound is, the global amount or the global envelope.
[00:08:26] Okay, so now that we have this, we can also go for a bit of noise.
[00:08:32] So this is more or less the body maybe of the percussion, but then we want to create a bit of
[00:08:39] noise on top as we go also your phone decay or feel like this. And we want to use a filter.
[00:08:49] I go for an XP filter because here we have the very nice peak filter.
[00:08:55] And we don't want you to pitch tracking. We start by at two kilohertz. So two kilohertz is nice for
[00:09:08] the snare top or for the for the percussion top noise. Don't want to have noise below that.
[00:09:13] And we have a nice resonance here. So what do we want to do now is we want to duplicate here again
[00:09:19] the dice. Oh, that's that's moving. Have to hold control. Okay, we want to modulate here upwards
[00:09:28] like this maybe 24 semitones also want to randomize the resonance up to nearly 100%
[00:09:38] self resonating want to make maybe make the stereo and we want to use distortion
[00:09:45] at the end and we want to mix this in. We can change blend between the body and the noise part
[00:09:55] and we can kind of mix it a bit a bit better and then we distort everything together. So let's
[00:10:01] hear the sounds. Okay, maybe we can also change the amount. So let's use a gain or maybe attenuate
[00:10:26] attenuate is better. So we want to change the amount of the FM modulation here. Maybe we start
[00:10:34] with 20% at least. And we duplicate us here go to 100% 0.75 also here. Something like this.
[00:10:58] So every time we randomize, we also get a random modulation amount.
[00:11:14] And we need to randomize the length here of this noise maybe we start very short.
[00:11:30] Maybe too much distortion.
[00:11:39] Okay, so then we want to randomize also here the detuning. So the left channel
[00:11:46] to the right channel we want to detune this slightly so we get a stereo feel.
[00:11:50] Not too much. And you maybe want to restart all the oscillators.
[00:12:00] So it produces the same sound. We also disconnect here the gate for a moment.
[00:12:09] So building this patch is actually not that complicated and you can throw in a lot of modules
[00:12:21] and push this in every kind of direction. The hardest part is actually tweaking this.
[00:12:27] So finding the right values, the right parameter ranges and so on. And this is
[00:12:33] then where your experience with sound design comes in. So we know exactly what to do and what to add
[00:12:38] to get a nice sound out of it. So we can also attenuate and we can say every time this body
[00:12:49] places envelope here, right? So this is the body envelope. You want to remove the noise entirely.
[00:12:58] So the body ducks the volume of the noise part on top. So you have a clean noise,
[00:13:04] clean body in the beginning. And then the noise comes in afterwards when the decay time is longer
[00:13:10] than this body here, right? That's the important part.
[00:13:13] Yeah.
[00:13:23] We get some interesting sounds out of it. Like I said, you need to tweak it.
[00:13:34] Okay. Another idea is let's go back here to the pulley grid to put an EQ in the post-fx
[00:13:42] box here of the pulley grid and go maybe for a low cut. And we want to use some DICE modules here
[00:13:54] for the EQ. Let's say the second band here and we start at 120 hertz. And we want to randomize the
[00:14:06] gain up to 20 dB. We make this very small.
[00:14:13] Let's randomize this here.
[00:14:24] Yeah. And we need to randomize the frequency, of course, up to 24 semitones.
[00:14:31] Maybe more dB.
[00:14:38] Nice. We do the same thing
[00:14:48] for band 3, 120 hertz. We start there until I hear this. This is by 36.
[00:15:00] We have the same kind of, the same kind of ballpark. The pitch.
[00:15:12] Oh yeah, we need to change the cue.
[00:15:19] And then we have another one. 120 hertz.
[00:15:25] Duplicate this to up to...
[00:15:33] This is 35.
[00:15:43] And the frequency goes up to also 35.
[00:15:47] And the IQ. And then we go into an over to clip everything.
[00:16:13] Okay. That's that. The best noise generator ever. We disconnect this here again.
[00:16:29] So we have a nice little percussion generator already. And we can add more things here. Like,
[00:16:36] I don't know, sometimes I use to add the phaser plus something like this, which is also just a
[00:16:43] filter. And you can use then dice here for instead of the LFO, the internal LFO, which goes down to
[00:16:57] 0.01 hertz. So it's still moving all the time. But when you feed it here, some kind of signal
[00:17:03] into it, it just takes the signal to move the internal oscillator around. Like the stereo.
[00:17:14] Gives you a different feel.
[00:17:34] But maybe at the end, we want to also include the high pass filter just to make sure.
[00:17:42] But actually, we have an EQ here and there with the high pass, but still 30 hertz.
[00:17:49] Very steep filter. Maybe a low pass also.
[00:17:57] Five kilohertz and not not so steep. Okay. So that's that. We can now
[00:18:04] use instead here this gate, which is cool. You can use a button.
[00:18:10] Call this generate.
[00:18:15] Use a button here on the device itself.
[00:18:22] Call this generate. Just connect this. And every time we press it, we get a different sound.
[00:18:30] Something like that. And easy peasy. We can maybe change a safety stand as a preset.
[00:18:50] Cush generator, save the surprises. We don't have to do this all the time, right? So this is the
[00:18:55] power of it. And then we go for a drum machine. And you can just put this into one cell.
[00:19:04] Use again here a button. Or maybe can we just open this over here like that?
[00:19:15] This actually does the same thing. And just modulate this.
[00:19:20] So now we can generate a new drum sound for this cell from the drum machine.
[00:19:29] But we can also just duplicate here all the things.
[00:19:45] We have multiple cells now with this generator, and we can press generate.
[00:19:50] And we have a different random sound in each of these cells.
[00:19:57] So we can create a drum track or a note clip. Start here with this.
[00:20:19] I don't know. Just duplicate us.
[00:20:30] That's it.
[00:20:42] It's a bit too much like a bongo. So yeah, it's probably better to get some more values out here
[00:20:50] into the container itself. So we can change maybe the decay time for each of these devices.
[00:21:05] Just down. 45. And we also go for 45. Maybe a bit longer, because the noise needs to be
[00:21:18] always a bit longer. Or we use multiple controls for different things. Also here maybe the mix.
[00:21:30] Mix for the phaser. So we can bring this out.
[00:21:36] And maybe the distortion here. Drive. Okay. Then we bring this over here.
[00:21:46] That's that. We have to connect this, right?
[00:22:00] Phaser.
[00:22:01] And drive. Nice. So now we have to delete everything, of course.
[00:22:10] Here it's wired up.
[00:22:16] Duplicate this.
[00:22:30] Okay. Generate. Let's see how this sounds.
[00:22:39] I hope you get the idea.
[00:22:59] The only problem, the only real problem is the old Bitwig problem that when you save it in this
[00:23:06] state as a project and you reload it, everything is gone. So you need to sample it at some point.
[00:23:13] Also, when you just hit here, let's say, use right click and say bounce, it goes into an offline
[00:23:22] bounce mode. And in this offline bounce mode, it also regenerates your older things or sets it
[00:23:28] back to zero, which is a pain in the ass. And I'm complaining for this for years now in Bitwig
[00:23:34] to have some kind of persistence module where you can generate with the dice random value and then
[00:23:43] store it into the state of the preset or of the device itself. So it persists. This is the only
[00:23:52] downside of this. So what I do sometimes then is just generating something that I really like. And
[00:23:58] then I create your new audio track and feed this basically into here. And then I record it.
[00:24:07] Right. And then I have your sample with this stuff.
[00:24:13] So this is how I do it. But yeah, you can save this drum machine here as a preset. Maybe I do this.
[00:24:25] I don't know how to call it simple perc generator or something like this. And then I put it into
[00:24:34] the description so you can download this here and have some fun with it. It's just a basic idea. So
[00:24:43] usually I spend more time on this. Where is it? Is it a percussion? Yeah, it's here.
[00:24:51] Digital rhythmic. So usually I spend more time on it on each of these different
[00:24:58] settings here. It's just a quick tutorial to show you how to build this or how to set it up.
[00:25:05] But you can go in so many different directions with this. You can use more oscillators. You can
[00:25:12] use more envelopes or different post FX or maybe add more noise, add samples to the mix and use
[00:25:21] different ranges here. The more you open up here, the range for everything, the more interesting the
[00:25:28] sound becomes or the more randomized the sound becomes. But then at some point, it's not a
[00:25:32] percussion anymore. It's just you get some random noise. Maybe I just draw this out here and show
[00:25:38] it to you. So here we go for a big range. The types goes back to zero. Also here.
[00:25:47] So this gives you more things.
[00:26:04] Oh, it's okay because it's not too long.
[00:26:10] Maybe you can also drive this here.
[00:26:15] Maybe hook this up here.
[00:26:22] Maybe FB is also too much.
[00:26:34] Yeah, you can spend hours on this. And I guess most of you are already spending too much time
[00:26:44] on stupid things. But you can create nice percussion sometimes for drum loops and you
[00:26:50] want to have something in between and you don't or you are too lazy to actually select some samples
[00:26:56] from the hard drive. And this is a nice way of doing this, in my opinion, or at least this is
[00:27:01] what I do in Bitwig Studio because I love it. Okay. Thanks for watching. Leave me a like.
[00:27:05] The link to this preset is in the description below. So you can just try it out for yourself
[00:27:11] or maybe build your own thing or just change it in your kind of direction.
[00:27:16] That's it. Thanks for watching. See you next time. Bye.