Posts tagged with Audio-FX

Here you can find a listing of all posts with the tag Audio-FX on my page.

Exploring Voxango Shine Chilla: A Comprehensive Guide

Jul 30, 2020 Tutorial
In this video, I demonstrated how to use the Voxango Shine Chilla, a distortion overdrive or saturation effect. I showed how to use the threshold and harmonic pages to generate overtones and how to use the saturation page to create rich overtones in the top end. I also went through the other features of the plug-in, such as the question mark, the naming field, the undo/redo, the A/B comparison, the channel routing settings, the group soloing, and the settings page. If you are interested in the plug-in, there is a link to the Voxango page in the description where you can download the demo version and try it out for yourself.

Automating Drum Loops with Bitwig Studio's FX Grid

Aug 03, 2020 Tutorial
In this video, I showed how to use Bitwig Studio’s FX Grid to automate drum loop editing tasks. By using Merge modules, Value knobs, and synchronization devices, it’s possible to offset drum loops to different time ranges and add breakdowns and fill-ins with minimal effort. I also showed how to use a Mod Delay to switch between different signals, as well as how to automate using a Button and a Macro Knob.

How to Use Bitwig's Hard Clip Preset for Maximum Loudness and Punch

Aug 11, 2020 Tutorial
I created a preset card hardclip for Bitwig Studio to clip the peaks of audio signals without going into the red or having intersample issues. The preset consists of Bit8, initial settings and two tool devices. I explained how to use it and how it can help to make a track sound louder and more percussive. I shared the preset in the description of the video, in my GitHub repository, on bitwig.community/presets and on the Bitwig Discord. I encourage viewers to save money and support my channel by using the link to the Bitwig Store with my code.

How to Use Chappy Chef and Oscilloscope to Create Multiple Combinations with One Knob

Nov 17, 2020 Tutorial
In this video, I explain how to solve a problem of controlling multiple knobs and parameters in a grid patch. My solution is to use a value module and three of them, then dial in different values to create multiple combinations. I then use a chappy chef and oscilloscope to modulate the first value, and then modulate the second and third values in different speeds. I show how to use a B to Uni converter and a Module Lator Out to count all possible combinations, and then replace the value modules with a sine oscillator and ADSR. I explain how to use a macro modulator and a remote control modulator to control all the knobs in the grid, and how to use a random modulator with each voice. In the end, I show how to slowly fade between all the states instead of switching between them in a quantized manner.

Getting Started with Bitfix Grid: Modulation, Audio Effects and Sequencing Techniques

Dec 01, 2020 Tutorial
In this video, I showed how to make a patch that I created in the last video more fancy. I demonstrated how to use modulators, audio effects, and sequencing techniques in Bitwig Grid. I discussed how to use the DC offset device in the NoteFX channel and how to create a reverb and phaser inside the grid. Lastly, I showed how to use an LFO to create sequences that go beyond the 32 bar limit.

Fade Between Different Audio Effects and Instruments in Bitfix Studio

Dec 07, 2020 Tutorial
In this video, I showed how to use Bitfix Studio's new FX Fader and Instrument Fader container devices to combine multiple instruments, audio FX and VSTs. I demonstrated how to use the modulator curves to create smooth transitions between layers and how to use the devices to add different effects to a hip hop loop and a synth patch. I also highlighted how to use the FX Fader to add random preset layers to a polygrid. Finally, I encouraged viewers to download the free presets and leave comments with any questions.

How to Side-Chain in Bitwig Studio: 4 Different Methods Explained

Jan 13, 2021 Tutorial
In this video, I showed how easy it is to side chain in Bitwig Studio. I demonstrated four different methods of side chaining, which include using a compressor plug-in, an audio sidechain modulator, a note sidechain, and an EQ plug-in. I also showed how to use the sidechain FX box to apply audio effects to the sidechain signal before it hits the analyzer. Lastly, I showed how to use the transient control to amplify or reduce the attack and sustain phases of a signal using a sidechain signal. Side chaining is not only for reducing the volume of a bass sound, it can be used for many creative effects.

Connecting VCV Rack and Bitwig Studio: A Quick Tutorial

Feb 23, 2021 Tutorial
I downloaded a zip file with the necessary files, and copied them into my VST directory. I then opened the VCV Bridge plug-in on my instrument track in Bitwig Studio and loaded up VCV Rack. I switched on the METE-CV module to bridge, and selected the device port 1. On the audio 8 device, I switched to bridge and port 1. This allowed me to have a MIDI in from Bitwig and audio out to Bitwig. I could then use my MIDI keyboard to play VCV Rack and have some fun.

Creating Music from a Drum Loop with Audio Effects

Mar 16, 2021 Tutorial
In this video, I showed some of the tricks I used to create a song out of just a drum loop. I used a resonator bank with a step sequencer and an audio side chain to extract the gate signal from the drum loop. I also used a pitch shifter, distortion, peak limiter, reverb, delay and a halftime plugin to shape the sound. I also used a quantizer, a comp filter and the harmonic series to add some extra elements. Finally, I used a limiter for quick mastering. I hope this video gives you some ideas or inspiration to try out in your own environment.

Introducing Piano Delays Preset Package - Create Unique Atmospheres with Bitwig Studio!

Apr 12, 2021 Tutorial
In this video, I showcase my new piano delays preset package, which is available on my Patreon for the five bucks tier. I demonstrate how it works by using the new electric keys package from bitwig studio. I explain how the seven presets work, such as creating fragments, slowing down and pitching up the delay signal, and creating a nice evolving atmosphere. I also mention how it can be used to sample for a sampler. I invite viewers to subscribe to my Patreon for the five bucks tier to download this package and have some fun.

Unlock the Power of Your Voice in Bitwig Studio

Apr 29, 2021 Tutorial
In this video, I showed how to use my voice as an instrument inside Bitvic Studio. I demonstrated how to create a vocal pad sound by using a Voice stack modulator and then showed how to use the Poly-Grid to control synths with my voice. I also showed how to use the Melda Auto Pitch Plug-in to create sounds on the fly and use a Zero Crossings module to get a clean pitch signal. Finally, I demonstrated how to create percussion sounds with my voice by using filters and transient shapers.

Using Sonible's Smart EQ 3 to Improve Your Mixes

May 05, 2021 Tutorial
In this video, I showed what the new Smart EQ 3 plug-in from Sonible from Austria can do. I tested it out on my own track called Craft and went through how to use it for drums, bass, and the master. I showed how to apply different profiles and manual EQ, as well as how to use the grouping feature to make sure the tracks work well together. I also mentioned that Smart EQ 3 is aware of the context EQing and prioritizes certain things over others. Lastly, I suggested that users try out the trial version to get a feel for the plug-in, and if they like it, to purchase it.

Explaining the Saturator in Bidig Studio: How It Works and What It Does

May 10, 2021 Tutorial
In this video, I discussed how the saturator in Bidig Studio works and how it can be used to enhance sound. I showed how the wave shaper works by changing the yellow line, and how the DC offset device creates a sound when modulated at audio rate. I also discussed the transfer function and how it can be used to change the wave shape of the signal in the positive and negative ranges. I then demonstrated the folding function and how it can be used to create a gate effect. Finally, I showed how the saturator can be used to add harmonics and make a sound more present, such as on a kick drum.

Exploring the Bitwig Modulation System with Harmonic Filtering

May 13, 2021 Tutorial
In this video, I experimented with Bitwig's modulation system and the HZF filter to create interesting sounds. I used the filter to analyze the input signal and amplify or suppress certain harmonics to get the desired sound. I also experimented with adding white noise and creating drone sounds by setting the filter to freeze and hold. I demonstrated how this could be used on a piano, vocals, and other instruments, and how presets can be saved with the current sound settings.

Creating an SP44 Magic Effect Section in Bitwig Studio

May 20, 2021 Tutorial
In this video, I show how to recreate the magic effect section of an SP44 sampler hardware device in Bitwig Studio. I explain how to make a chain device to contain all of the effects, and then I go through each effect step-by-step. I demonstrate how to create a beat repeater, a bit crusher, an EQ, a delay, a filter, a pitch wobble, and a low fire effect. I also show how to use remote controls to trigger the effects and how to synchronize them to the beat grid. Finally, I provide a free preset to download in the description.

Implementing Thresholds in the Bitwig Grid

May 21, 2021 Tutorial
In this video, I demonstrate how to implement a threshold using the audio grid in Bitwig Studio. I use a random drum loop as an example and show how to analyze the signal using a follower and a constant. I then subtract the constant from the follower to get the threshold line, which is then used to trigger a gate signal. I finish by showing how to adjust the threshold value and make sure the audio is in mono.

Discovering the UltraFat Compression Preset in Bitwig Studio

Jun 08, 2021 Tutorial
In this video I introduce a new preset called UltraFat that I created in Bitwig Studios. It's an expander that pushes up sound that is above a certain threshold to 0 dB. I use 3 compressors in an FX3 container, and a limiter at the end. I also have a noise and low-fi function, as well as a cross-over knob. I demonstrate how it works by playing a drum loop, and show how it can be used to normalize sound levels. The preset is available to download on my Patreon page, and also on YouTube's community section.

Exploring the Polynomial Modulator in Bitwig Studio

Jul 06, 2021 Tutorial
In this video, I showed how to use the polynomial modulator inside Bitwig Studio to create interesting distortion, wave shapes and overtones. I demonstrated how to use a DC offset device with the modulator, and how to modulate the X parameter with an audio rate modulator. I also showed how to use an LFO, as well as a stereo split to create unique sounds. Finally, I shared some tips and advice on creating presets, and how to save the new device for future use.

Integrating Hardware Synthesizers Into Polarity Studio: Exploring the Possibilities

Jul 27, 2021 Tutorial
In this video, I discussed my recent journey with hardware synthesizers and how I have been integrating them into my setup. I discussed the process of setting up my mixing desk, an ADA 8200 extension port, and an ID14 MK2 sound card in order to record multiple hardware synthesizers at once. I also discussed the shortcomings of hardware synthesizers and how I have to record every parameter movement in order to keep the same sound. Finally, I mentioned my plans for creating special content for my Patreon gold tier members and potentially creating a tier for German videos.

Creating a Barberpole Phaser Preset in Bitwig Studio

Jul 28, 2021 Tutorial
In this video, I demonstrate how to create the Barberpole phaser preset in Bitwig Studio. I show how to adjust the frequency, feedback, stereo spread and mode. The preset creates a continuously rising sound in the style of a shepherd tone, and can be used to add texture to pad sounds, bass and other tracks. The preset is available on my Patreon page, and I hope you'll check it out and leave a thumbs up if you like the video.

Sending Signals Across Channels: How to Create Global Modulations in Bitwig Studio

Aug 02, 2021 Tutorial
In this video, I show how to send signals from one channel to another to change parameters or modulations. I demonstrate this with a bit Rig tutorial, showing how to use a DC offset device to send signals from one channel to another. I also explain how to use a MIDI CC device and Note Receiver to send signals to multiple sub channels. I then demonstrate how to mix audio and MIDI information on the same channel, and how to generate notes on an audio channel with a Replacer. Lastly, I demonstrate how to use a Poly-Grid to send MIDI CC signals to another track.

Creating Modulated Sounds with Infiltrator by Devious Machines

Aug 04, 2021 Tutorial
In this video, I bought the BST plugin called Infiltrator and talked about why we need an interface designer in Bitwig Studio. I demonstrated how to use the plugin and showed how it makes creating modulations and sequences easier. I also mentioned the need for modules that can get information back to the front end and the possibility of creating an interface designer in Bitwig Studio. I then showed a track I made with the Infiltrator and concluded by suggesting viewers try the plugin and possibly consider subscribing to my Patreon.

Using Pitchmap by Zynaptiq for Synths, Samples and More

Sep 20, 2021 Tutorial
I recently bought the pitch map plugin by Zynaptiq, and I've been experimenting with it to create unusual workflows. I can use it to correct a pitch to a different note, and I can also use it to turn percussion sounds into synths, or use samples in the sampler. I can also use it on my Eurorack and analog synths to get diatonic chords. Overall, pitch map is a really useful plugin that I'm having a lot of fun experimenting with.

Creating Looping Presets with Little Looper in Bitwig

Sep 27, 2021 Tutorial
In this video, I created two new presets for my Patreons called Little Looper Synced and Little Looper raw. I explained how they work and what you can do with them. Syncd is quantized to the project tempo, while Raw lets you start and stop recording anytime. I showed how you can use them with a synth line and how you can customize the settings, such as loop length, pan, start offset, and restart. I also showed how you can use them with a radio and for sound design, and how you can replace the steps with a random or dice module. I hope this video was helpful, so if you're interested, don't forget to subscribe to my Patreon or YouTube Membership to download these presets and let me know what you think in the comments.

Unfilter by Zynaptiq: Automatically Reduce Resonances in Your Mixdown

Oct 18, 2021 Tutorial
In this video, I tried out Unfilter by Zynaptiq and I was surprised by how well it works. I demonstrated how it can be used to reduce resonances and improve the frequency distribution of a drum loop. I also showed how it can be used to tame harmonics and create a more balanced sound. I discussed some of the features that make Unfilter unique, such as the decay setting and the Fletcher Monson curve. I concluded by recommending that viewers try the trial version to see if Unfilter is right for them.

Exploring Audio Effect Building in Bitwig Grid

Jan 19, 2022 Tutorial
In this video, I showed how to create various effects, such as phasers, flangers, chorus, low pass and high pass filters, reverbs, and pitch effects, in the Bitwig Grid. I demonstrated how to use FX Grids and Chain Devices, as well as how to manipulate the delay time of a signal with an LFO and the Time Shift Device. I also showed how to create a multi-tap delay with the Long Delay and a Multi-Lay, as well as how to use the gates module to record and playback audio. Finally, I discussed the use of an AD envelope to reduce clicks in the signal.

Using Transient Shaping to Enhance Your Drum and Bass Productions

Jan 20, 2022 Tutorial
In this video, I showed two examples of how I use the transient shape tool on a daily basis. I showed how I use it to glue together multiple drum loops, and how I use it in conjunction with an FX2 or FX3 device to make drum sounds more punchy and aggressive. I also discussed how it can be used to bring out the attack of a kick drum, or to remove the sustain of a snare sound. I hope this video gave you some ideas on how to use the transient shape tool in your own productions.

Creating a Spacey Reverb in Bifix Studio - Free Preset Download!

Feb 01, 2022 Tutorial
In this video, I showed viewers how to create a reverb inside Bifix Studio and the Grid. I began with loading a piano sound and then I created a stereo merge and split effect with an all pass device on each side. I then introduced a long delay and connected it to the output and input. I also added a modulation, random LFO, attenuate, and peak limiter. Lastly, I showed how to duplicate the patch and add a pitch shifter and chorus for a shimmering sound.

Creating Drum Variety with Audio Effects Racks in Bitwig

Feb 24, 2022 Tutorial
In this video I showed how I use audio effects racks to save time and create interesting sounds. I demonstrated how to use a mixer, recorder, step-smoother and attenuator to create ghost notes at the end of a drum loop. I also showed how to use the FX grid and gate modules to create a delay or reverb effect that occurs when the snare is triggered. Finally, I explained how these audio effects racks can be saved as presets and used in other projects.

Replicating Bitwig's Delay Plus in the FX Grid

May 30, 2022 Tutorial
In this video, I explored the differences between the native Bitwig devices like EQ Plus and Flanger Plus, compared to the grid devices like Delay Plus and Polymer. I speculated that in the future, we may get container devices that allow us to build our own devices with DUI interfaces without having to hassle with the DUI designer. I demonstrated how to construct a Delay Plus-like device in the FX Grid, using a diffusion network, EQs, and a ducking knob. I concluded that while we can't replicate the Delay Plus exactly in the Grid, it is possible to create something similar in its place.

Synthesize Low-End with Tree Monster in Bitwig

Jul 25, 2022 Tutorial
In this video, I demonstrated how to use the Tree Monster to add low-end to snare sounds and other audio signals. I showed how to use the Tree Monster to analyze the audio signal for resonant frequencies and then synthesize a sine wave to it. I also showed how to adjust the settings, such as the frequency range, speed, threshold, and mix knob, to get the desired sound. I also suggested using a Transient Shaper for extra sound design and bouncing the sound for stability. Finally, I showed how to use the Tree Monster to analyze vocals and other tonal sounds.

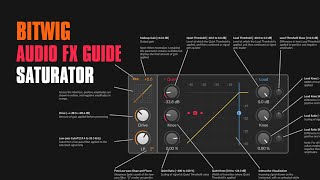
Saturator - Audio FX Bitwig Guide

Nov 07, 2022 Bitwig Guide
This video is about exploring the saturator in Bitwig Studio. Polarity explains how it applies a transfer function, represented by a yellow line, to a signal which creates harmonics and distortion. He also explains how to use the saturator to create a gate effect or to alter the tonality of a sound. He further explains how the wave shape of the saturator can be changed in the negative and the positive range, and how the loud threshold and the knee knobs affect the sound. Finally, he demonstrates the saturator on a kick drum and explains why overtones are important.

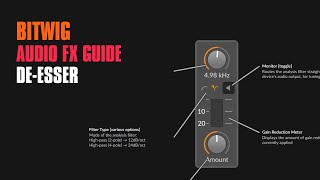
De-esser - Audio FX Bitwig Guide

Nov 22, 2022 Bitwig Guide
This video is about the De-esser feature in Bitwig Studio, a software program. The video explains how to use the compressor to reduce the loudness of harsh frequencies, as well as how to adjust the cutoff frequency, gain reduction, and filter type. The video also provides examples of how the De-esser can be used on drums.

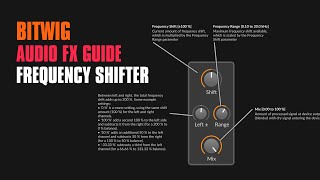
Frequency Shifter - Audio FX Bitwig Guide

Nov 22, 2022 Bitwig Guide
This video is about the frequency shifter of Bitwig Studio, which shifts the frequencies without changing the pitch. It explains how to use the knob to shift the frequencies up or down and the range knob to adjust the amount of frequency shifting. It also explain how to use the left knob to create a stereo effect, the mix knob for dry or wet signal, and how to use the frequency shifter on drums and kick drums to create a variety of different sounds.

Creating an Interesting Drum Repeater with the Bitwig FX Grid

Feb 17, 2023 Tutorial
I showed how to create a beat repeater with the FX grid by splitting the drum loop into four recorders and sequencing them. I explained how to use the phase input to evenly step through the split device, and how to use the phase signal to rearrange the playback order. I also showed how to use the mirror output to create a faster playback with finer grains. Finally, I demonstrated how to use a step sequence to blend in the repeater.

Test Tone - Audio FX Bitwig Guide

Mar 03, 2023 Bitwig Guide
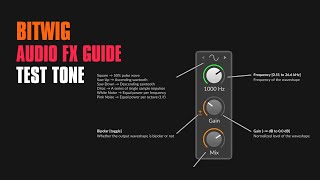
I used the Test Tone device in Bitwig Studio to demonstrate how it can be used for testing speakers, effects chains, or other sounds. I showed how to use the oscilloscope to view the waveform of the sound, as well as how to adjust the frequency, gain, and bipolar modes. I then demonstrated how to use the Test Tone to create a monophonic synth by modulating the gain with an ADSR and adding a vibrato with the mod wheel. I also showed how to use the Test Tone to create a polyphonic synth with the instrument selector. Finally, I demonstrated how to use the Test Tone to create a ring modulator with a source effect.

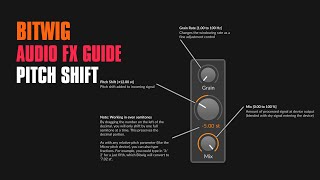
Pitch Shifter - Bitwig Audio FX Guide

Mar 07, 2023 Tutorial
I love using the pitch shifter device in Bitwig Studio to create creative sound effects in my productions. You can dial in the amount of shifting with a big knob in the middle, and the maximum number is 12 semitones up and 12 semitones down. The grain control allows you to change the update rate of the internal buffer, which can result in a grain delay effect. The mixed knob lets you blend in the dry signal with the pitch shifted signal to add some shimmer to the sound. I find that the lower values of the grain size work best for creating unique and interesting sounds. You can also use the pitch shifter in parallel with different settings for each layer to get a variety of different sounds.
Creating a Robotic Voice with Formants in Bitwig Studio

Mar 09, 2023 Tutorial
In this video, I explained what formants are and how they can be used to simulate a robotic voice. I showed how this can be done in Bitwig using the XP filter and vector 8. I also demonstrated how this can be achieved using Vital, a subtractive wavetable synthesizer, and a vocoder. Finally, I shared a free preset called Bitwig Lama which can be used to create this effect.

More Tags to choose from:
posts Btwig-Guide Bitwig Audio-FX Article Guidelines Generative Music Sampling Note-FX Synthwave Drums Mixing Sound-Design Ambient Gridnik Plugins Drum-and-Bass Distortion Reverb Tutorial Analysis EDM Grid Automation Delay-plus Modulators Preset Sampler EQ-plus Filter Note-Grid fm-synthesis Percussion Synths Bass Midi Synthesis Compressor Delay Modulation Feedback EQ BitX Studio MPE Controllers Clitch Comp Filter Ultra Reservoir Polyphonic Mode Chords Polysynth VCV-Rack Resonator Groove Comb Filter Modal Synthesis Wave-Shaping Saturation Follower Threshold Max Value Comparison EQ-2 FX Grid Mid-Side Split Infiltrator Devious-Machines Peak Limiter EQ-5 Randomization Atlas Hardware Zynaptiq Unfilter Pitchmap Bespoke DAW Harmony-Theory Transposer Tips-Tricks Melodic-Techno Track from Scratch Glitch-Hop Transient-Shaper Minimal Audio XLN-Audio XO Sononym Cosmos Valhalla FM8 Native Instruments Bleass Psych Limitation Update Convolution Clap Community free Extension Eurorack Diva Monark dpMeter tbProAudio Arrangement